How To Add A Popup And Edit It on Weebuilder
In this article you will learn how to add a pop-up to your existing web page and how to edit that pop-up with any information that you would like to appear on there.
- Go into an existing sales page, if you are already there click on the ‘gear symbol’ on the upper right of the page
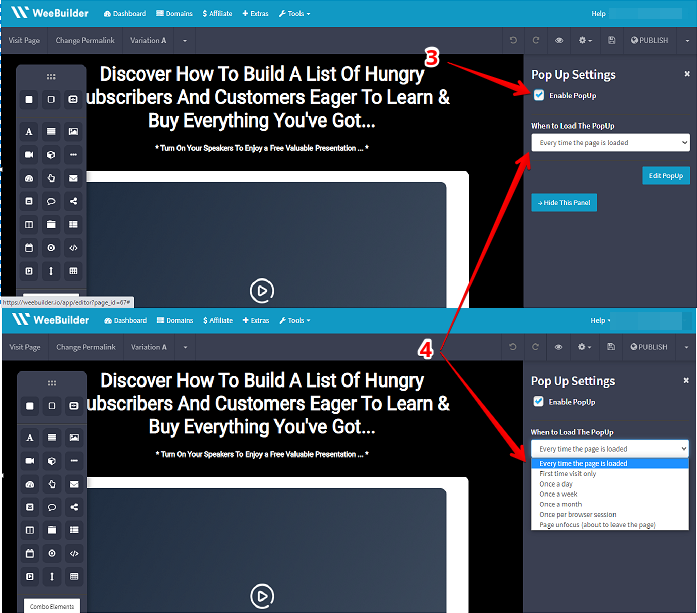
- Next is to click on ‘pop-up settings’

- A Pop-up settings window will then appear on the right side, check on the box to ‘Enable Pop-Up’
- Then you would also want to choose where this pop-up would appear. Click on the ‘When to Load the PopUp’ and you will have an option: Every time the page is loaded, First time visit only, Once a day, Once a week, Once a month, Oncer per browser session, or if your visitors are about to leave the page you can have a pop-up using Page unfocus [about to leave the page] that makes visitor to stay perhaps to opt-in. As am example let’s choose ‘Every time the page is loaded’
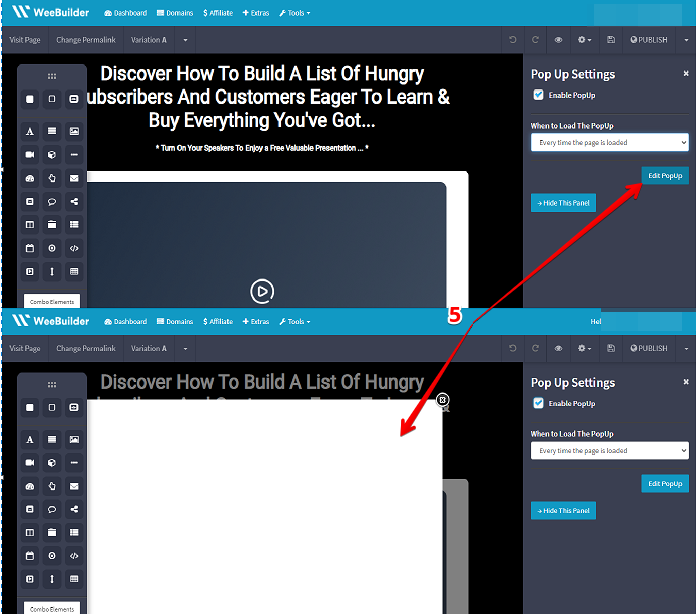
- For you to be able to edit the pop-up, click on the ‘Edit PopUp’ button and a white box will appear that’s where you would want to put in the details you want on your pop-up.
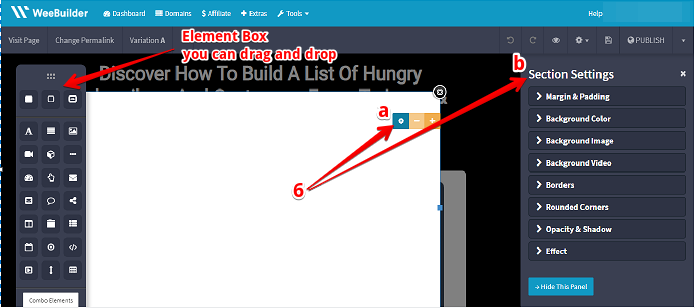
- Now you can add any element that you like to the pop-up window. You can just drag and drop from the element box on the left. Or you can click on the pop-up window and a gear symbol will appear for the section settings.
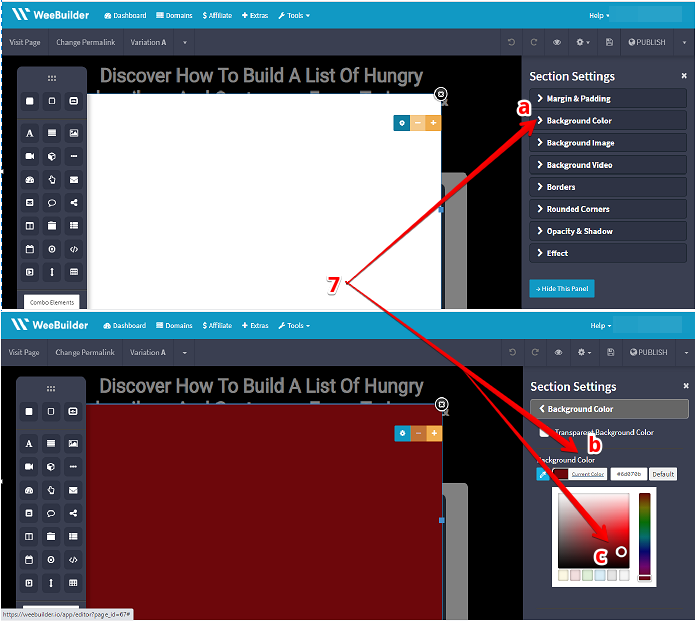
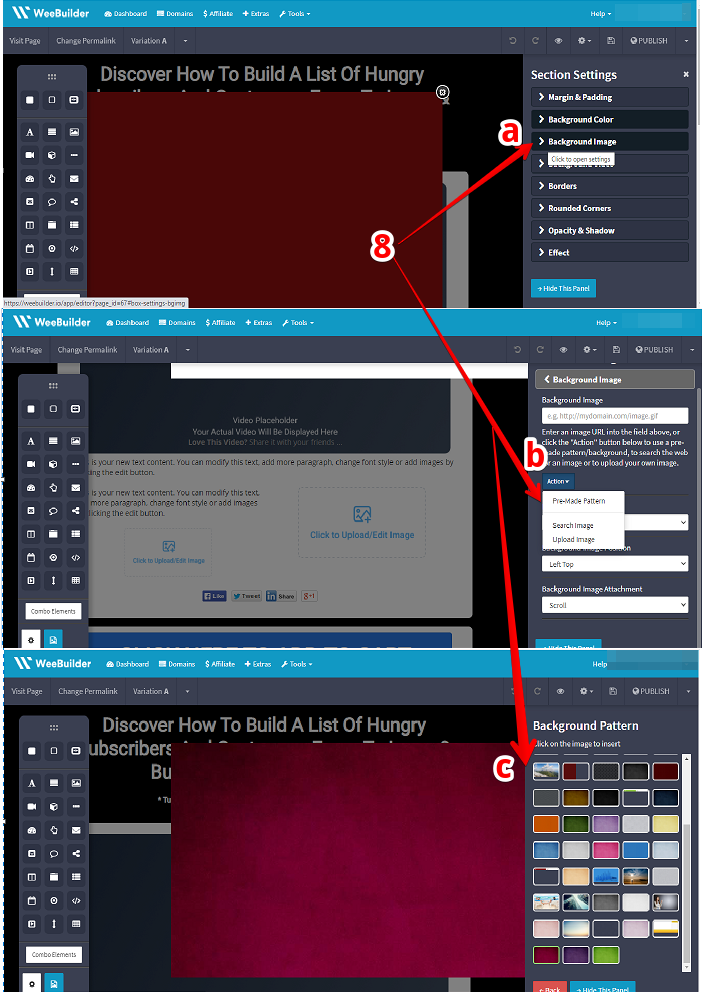
- You can now edit what the pop-up will look like. You can add Margin and Padding, Background color, Background image, Background video, Borders, Rounded Corners, Opacity and Shadow, and Effect. For example you would like to add a background color, just click on that and choose any color to your liking. You also have the option to tick the ‘Transparent background color’ box if you want the visitor to only see the content that pops-up.
- After that you can go ahead and go back to section settings and click background images if you feel like adding images on the pop-up. To do that, click on ‘Action’ now you will have the option of using pre-made patterns, search an image, or upload an image. Pre-made patterns are provided by Weebuilder for the convenience of its users.
- You can also add borders on your pop-up by going back to the section setting and choosing ‘Borders’ then go ahead and choose the color and style you want may it be solid, dashed, dotted, or double line. You can also adjust your border’s thickness by dragging the cursor from left to right depending on your preference.

- . Next, you can go to rounded corners. You need to go back to section settings and then click on ‘Rounded Corners’ now you can move the cursor to left or right to adjust the roundness of the corners of your pop-up.

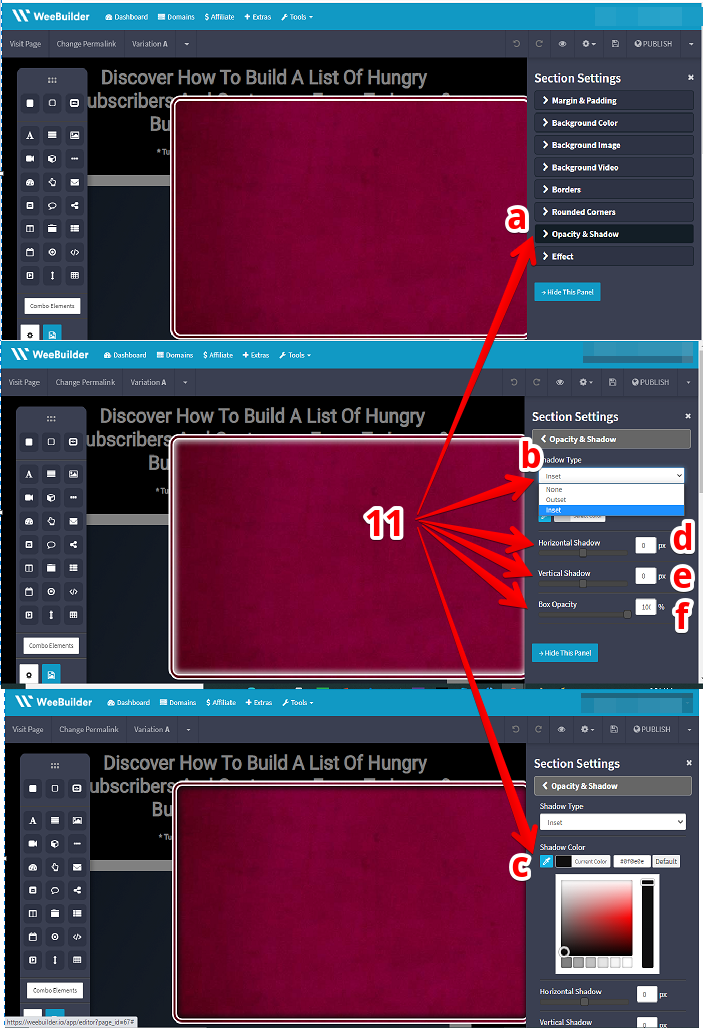
- When you click back to section settings you will also have an option to adjust the opacity and shadow of your pop-up. Click on ‘Opacity & Shadow’ then you can choose between onset or inset as your shadow type. Choosing onset will have your shadow going around outside the pop-up box while inset will have your shadow placed inside the box. You can also choose what shadow color you prefer. Adjust your shadow horizontally or vertically or the opacity of the box. This setting will help you change the opacity and the direction of the shadow on your pop-up or image.
- Lastly you can put effects on the pop-up as you go back to section settings and choose ‘Effect’ and choose the display animation you want for your pop-up. Here are the few options that you can choose from: Blind, Bounce, Bounce in left or right and many more. Again, you will have an option to adjust your section’s opacity. Those are the elements that you can edit on the pop-up itself.

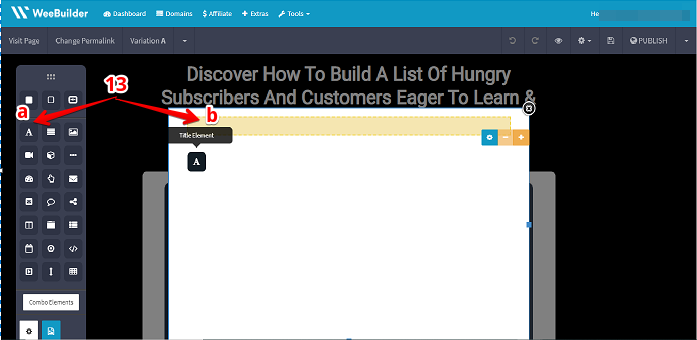
- To edit what is actually inside the pop-up itself, go to the element box on the left side and what you need to do is just drag and drop your chosen element on the pop-up box. For example you would want to put a title, just click and drag the title element to where you want it to be in the pop-up.
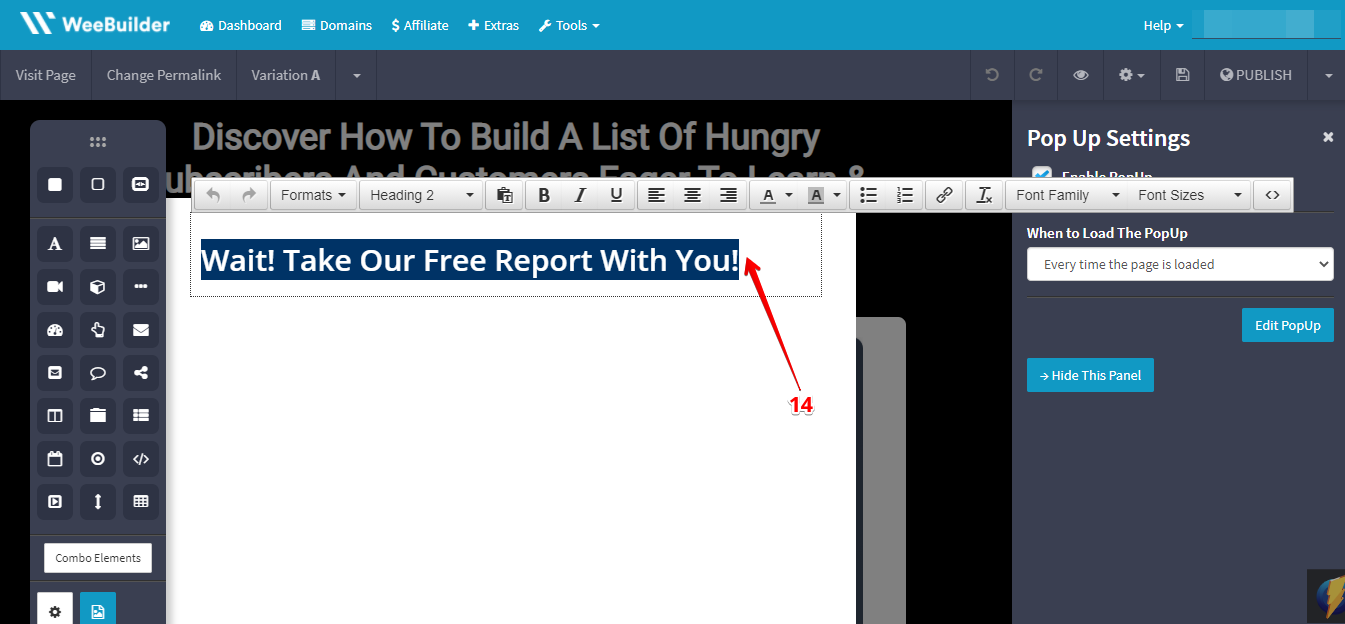
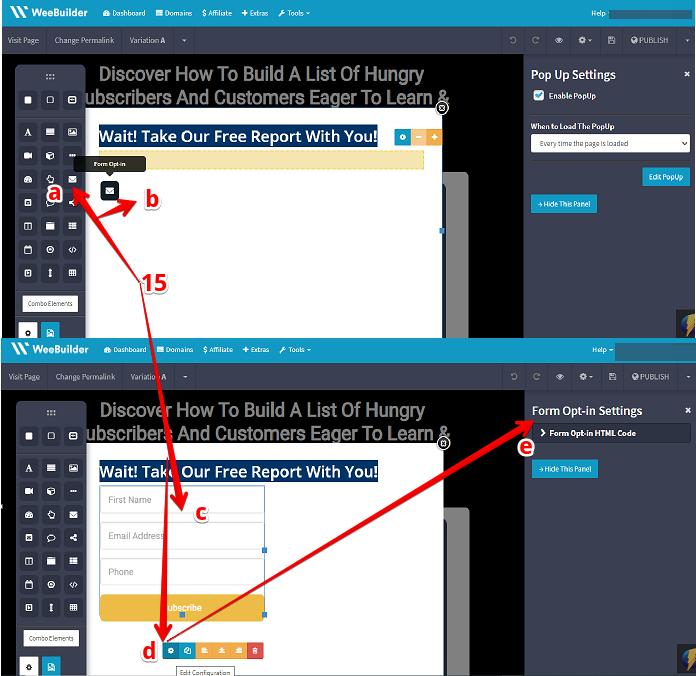
- Then you can type in any title you would like to draw your visitor’s attention inside the text box. Double-click it to edit text accordingly. For example let’s add ‘Wait! Take Our Free Report With You!’
- After that you can add in an Opt-In form from the element box on the left by dragging it again on the pop-up box. Then you can edit it by clicking it and choosing the gear symbol. A form opt-in setting will then pop-up on the right hand side of the page so you can edit the form the way you wanted it to look.
- Perhaps you would like to shrink that pop-up so it fits the page perfectly. You can do so by dragging it to shrink or expand. After that you can go ahead and save your work by clicking in the save icon or the floppy disk icon on the top right of the page. You can also preview it by clicking the preview or eye symbol on the top right as well. This will help you see how your page will look like.
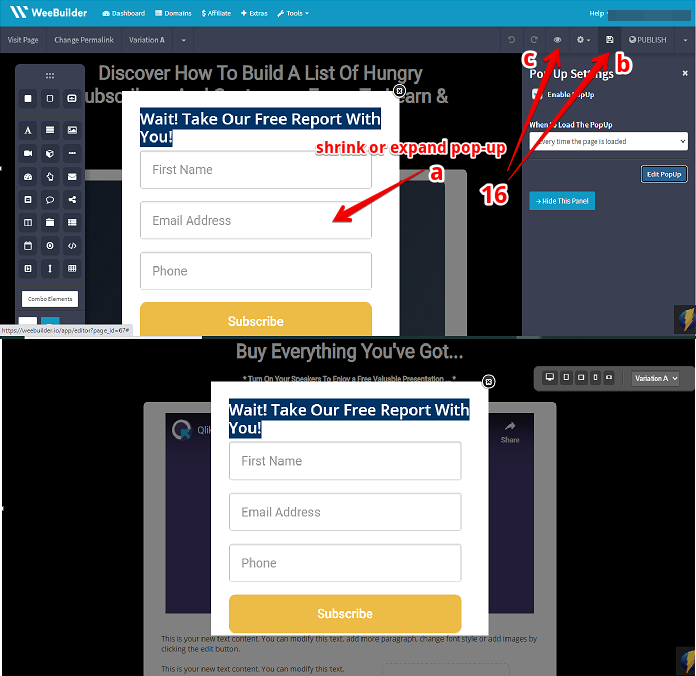
Now you have a nice pop-up form that looks good on your website that you have set up so that it appears at every single page load that’s professional looking. That’s how simple it is to add a pop-up to your website.