How To Add Additional Fields To Optin Form on Weebuilder
This guide will help you add multiple fields to your Opt-in forms inside Weebuilder.
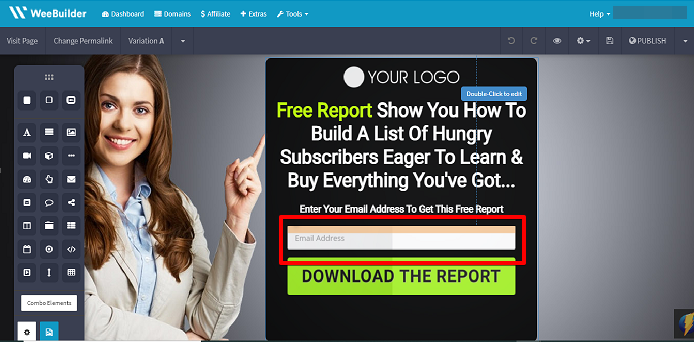
Let us choose a Squeeze page as an example. From here you could see that all you have is the email address that you are collecting and perhaps you want to collect more information from your subscribers maybe their name, their address, zip code, or phone numbers or whatever it is that you want to add besides the email address.
Here are the step by step process on adding more fields to your Opt-in Form
- Go to your AWeber account and go to Sign up forms. All you have to do is to add the information you would like to collect to the web form you are creating and once you do that Weebuilder is gonna automatically pull the information for you.
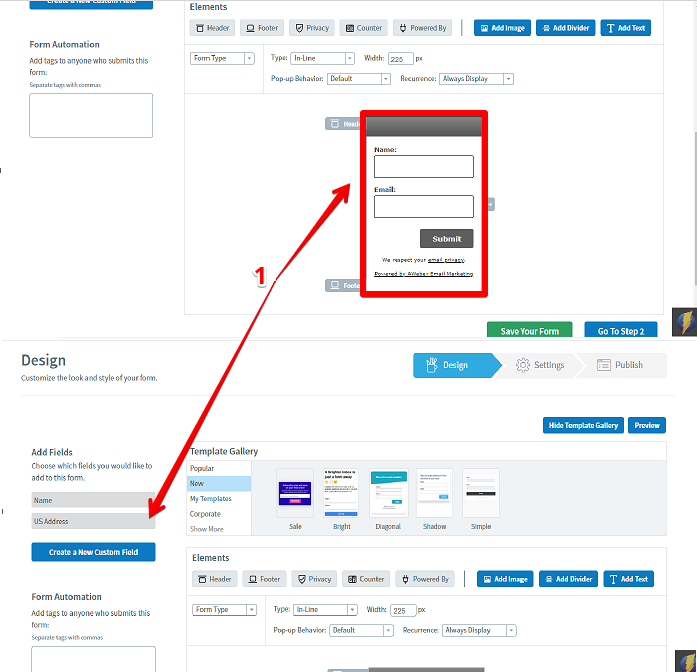
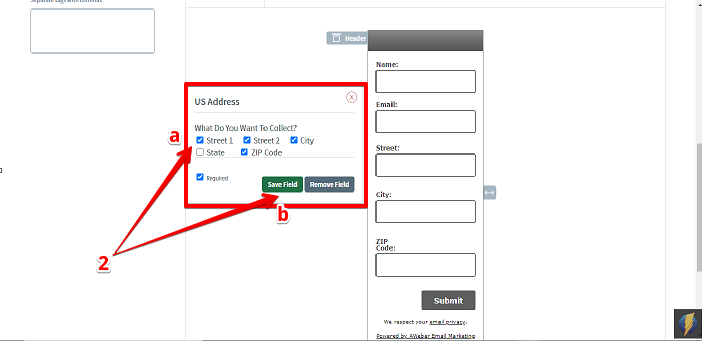
- If you are already there, for example all you have is name and email and you would like to add their address and what you would like for them to include is their city, street, zip code. And if you think their state is not necessary you can get rid of that as well by ticking in the small boxes beside the choices. Now all you have to do is save that.
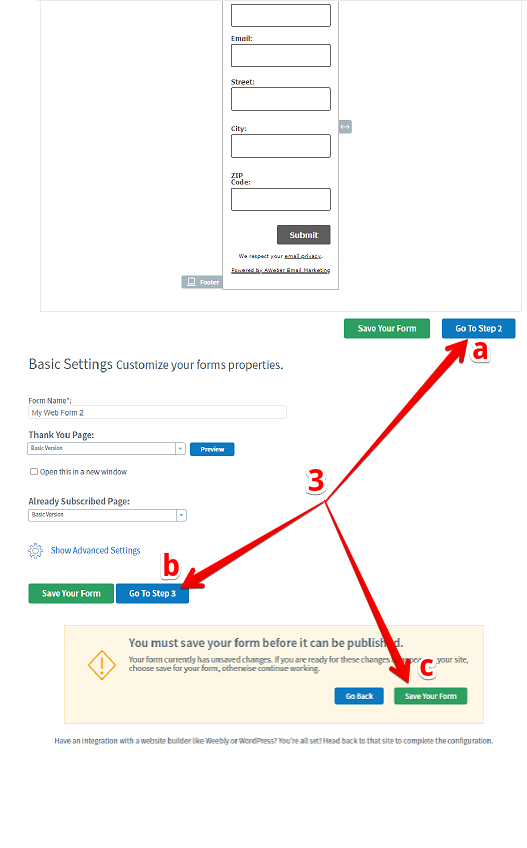
- Now you have all these different fields. Next is click ‘Go to Step 2’ when you are there click ‘Go to Step 3’ and ‘Save’ your form.
- Now all you have to do is grab or copy the html code in the ‘I will install my code button’.
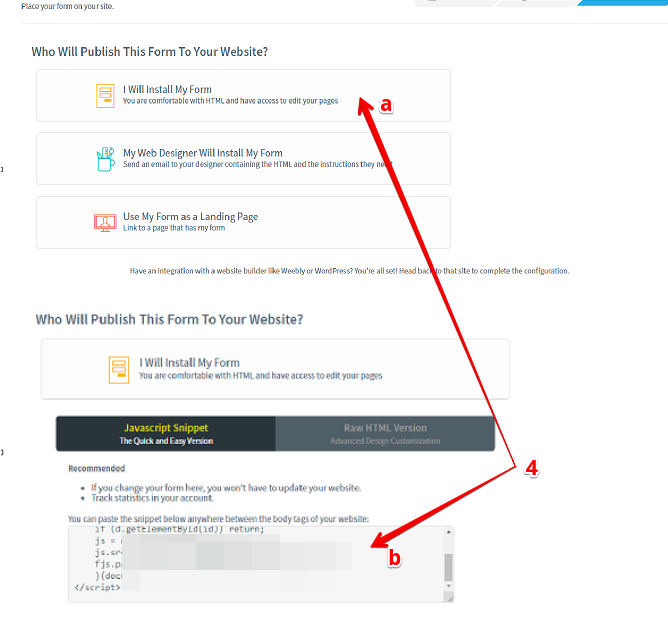
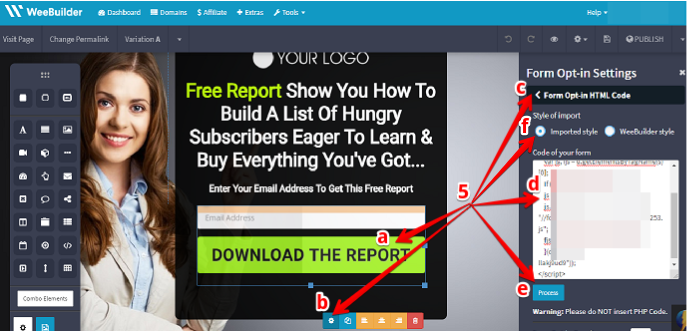
- After copying the html code, you can now go back to Weebuilder. Click inside your opt-in form and click on the gear symbol and on the right side an opt-in setting will pop-up. Go ahead and click on the HTML code and paste your copied code on AWeber and click ‘Process’. Please note that you can also choose the style of import, say you want to retain the imported style or you want Weebuilder style.
How your Opt-in would look after applying the code from AWeber.
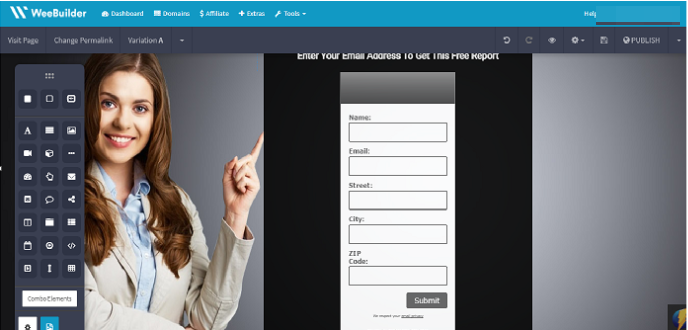
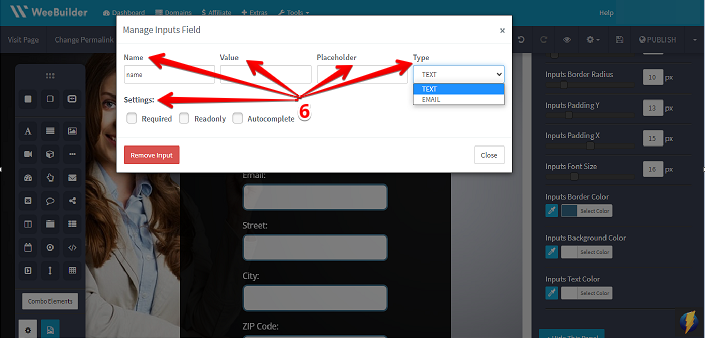
- Now you have the name, email, street, city, zip code field but maybe you would like to change the name. You can do so by clicking on the corresponding box that you would want to edit so you can manage each field on your Opt-in form. You have the choice to change the name, value, placeholder, type, and the settings of each field or remove the input.
- Do not forget to save your work. Click on the
 icon on the upper right of the page to do so.
Just like that Weebuilder has linked up with our auto-responder and it included all the additional fields that you need for your opt-in page.