There are two-ways, first use a 3-Step Optin template that has been provided for us by Weebuilder and second you can create your very own 3-Step Optin from scratch.
Step by step process on building a 3-Step Optin page with a template
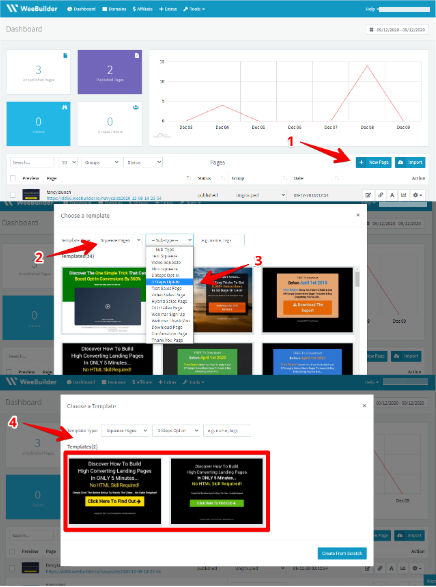
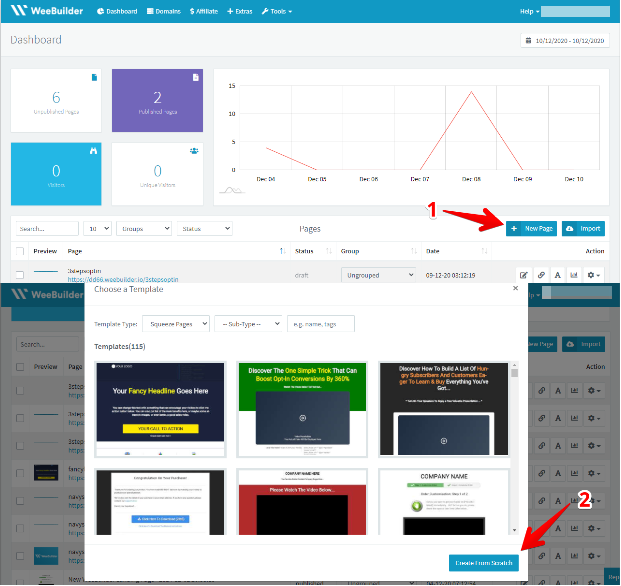
- Go to the Weebuilder dashboard, once you are already there click on ‘new page’.
- Next, you can choose what kind of page you like and choose from the different templates preloaded by Weebuilders. (Template type: Sales Pages, Squeeze pages, Launch pages, webinar pages, coming soon pages, and others) This time will choose the Squeeze page as an example.
- You can then click ‘Sub-type’ and choose the 3-steps Opt-in option. The app will automatically filter your preferred template.
- You can then choose which loaded template you would like to use.
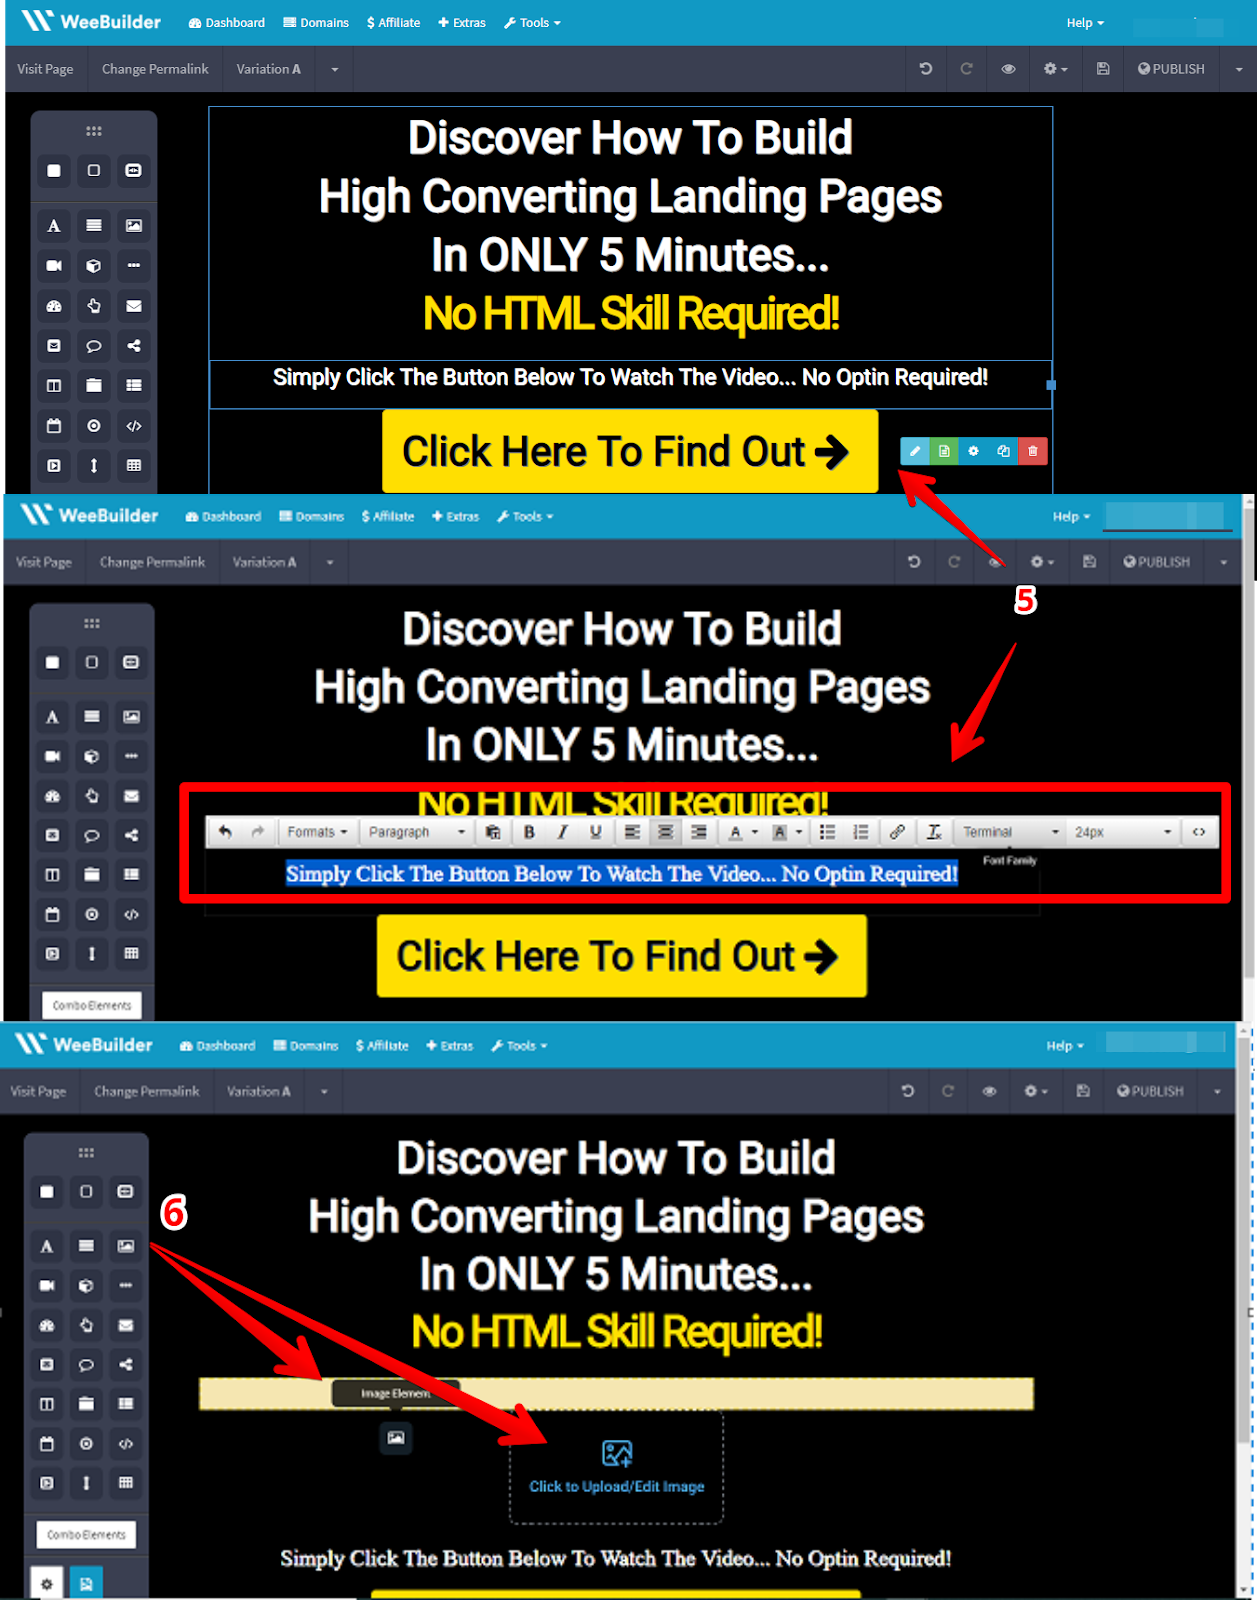
- After choosing your preferred template, it will populate and load up into your own visual editor. You can then edit all the information that is on this template. You can change the background, text, or font style by clicking on the pencil symbol.
- You can also add more elements to the page if you want to by dragging in elements found on the tool box on the left, for example an image.
Now the 3-step optin is a little different than your 2-step optin.
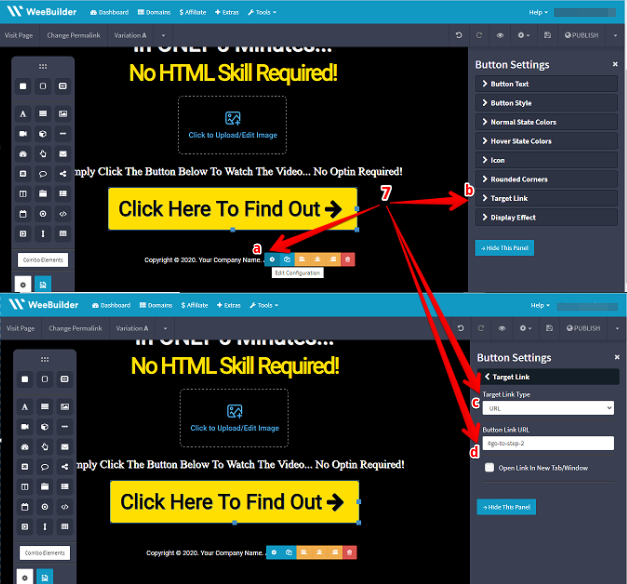
- If you are going to click on the button and you go to the gear symbol and check the target link, target link type should be a URL and button link URL should be #go-to-step-2. This should be automatically set up on your template as well as when you make a 3-Step Opt-in from scratch as well. No need to fuss, just keep it as it is.
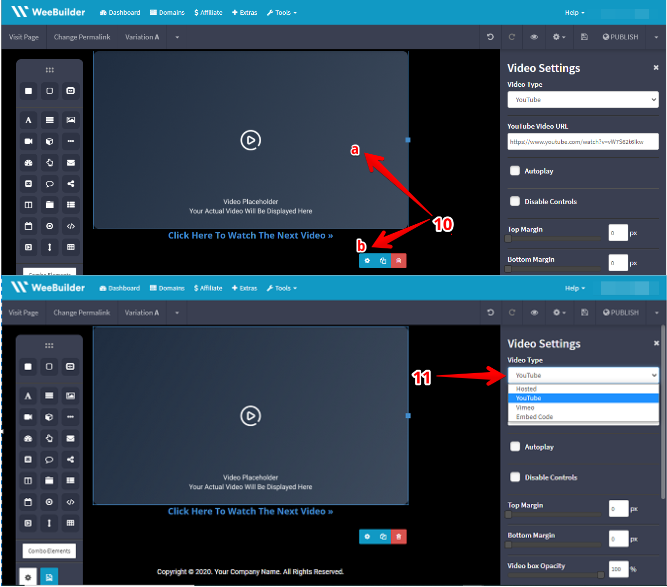
- Now to edit the second step of our 3-Step Optin page, we would want to click on the background, it should be the entire box and it should be highlighted. You will then see the left and right arrows below it. These arrows will let you switch back and forth between the three different steps.
- Clicking on the right arrow will then lead us to step two like a breeze.
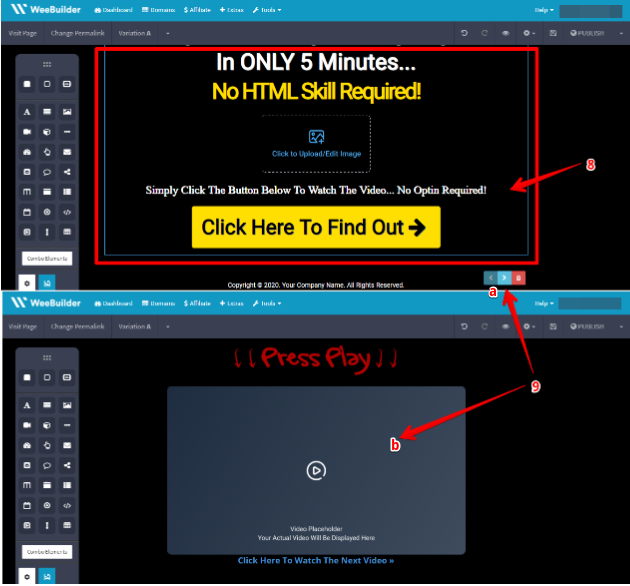
- Now on this step we can add anything we want to appear on the page. For example a video. Just click on the video and gear symbol and options will appear on the right.
Tip# 1 Perhaps we want them to initiate and take action on the first step and on the second step we want to show them some kind of teaser videos or a trailer of your product that will make them click our call to action which in return would take them to step 3 of our 3-Step Optin.
- You can then choose the video type (eg. YouTube, Hosted, Vimeo, or Embed your own code).
Tip#2 Just like the first step you can change anything on this step, add headline or a title for example and edit this and make it look all nice and more appealing to your target market.
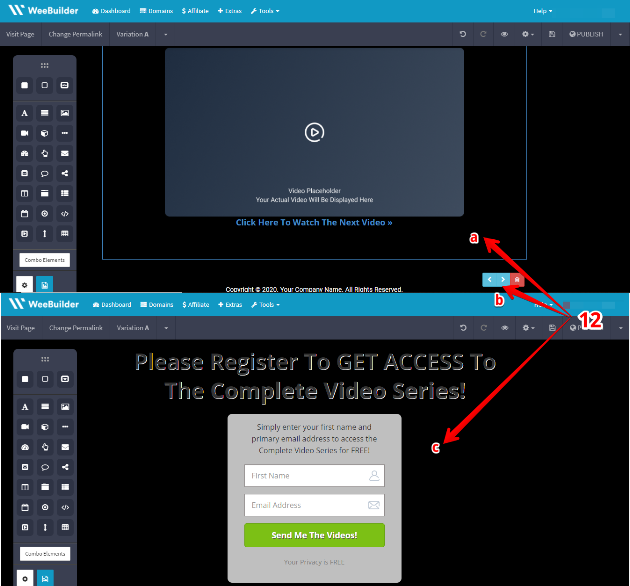
- And now to go to our third step, click on the background of the page again and click on the right arrow as this will take you to step three where you have your Opt-in form. You can edit and change anything on this step just like with the previous steps.
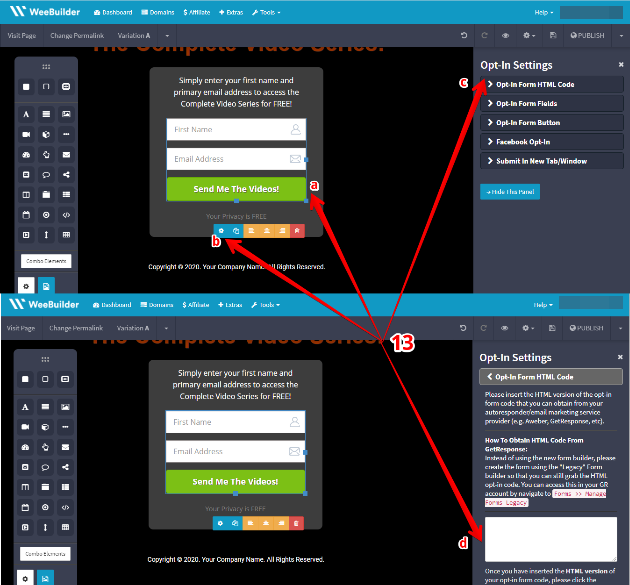
- Just like in the first two steps you can change anything you want on this step by dragging elements on where you want it to be in the page. Do not forget to click on the Opt-in form and click the gear symbol on the right hand side. You will then see ‘Opt-in Form HTML Code’ click on that and make sure to paste the HTML code inside of this box. Once you have that paste in there, you can then save it and go about editing the look and feel of your website.
Tip#3 The HTML code you need to put on the box is the code you received from your auto-responder or your email marketing service provider. Like, AWeber or Get response whichever auto-responder you are using. Make sure you paste your HTML code inside the box.
- After editing and giving your 3-Step Opt-in a revamp, you can then preview your website and see what your visitors will see by clicking on the ‘Eye symbol’ on top right of the page.

As visitors get to your land page they are going to click the ‘Click Here To Find Out’ button to find out more. As they do that they are going to land on the second step of our three step Opt-in wherein they will be able to watch the video you uploaded. Then they’re gonna click on ‘Click here’ which will lead them to your Opt-in form, this will slide up and will have to optin before they could have access to your complete video series. That’s pretty cool right? A very powerful way to increase the quality and the conversion rate of your actual optin form.
So that’s how you do it with a template. We promise you that it will be just as simple creating it from scratch as well.
Step by step process on building a 3-Step Optin page from scratch
- On your dashboard go to ‘New page’
- Select ‘Create from scratch’
- Once that loads up, you will have a blank canvass. All you need to do is go over the element section and choose the 3-Step Opt-in tool. Click on that and drag it over and you will see that it will pre-populate with a headline and a button. You can go ahead and edit or change it anyway you like. (From here on you can repeat steps# 5 to 14 from the 3-Step Optin page with a template process guide)
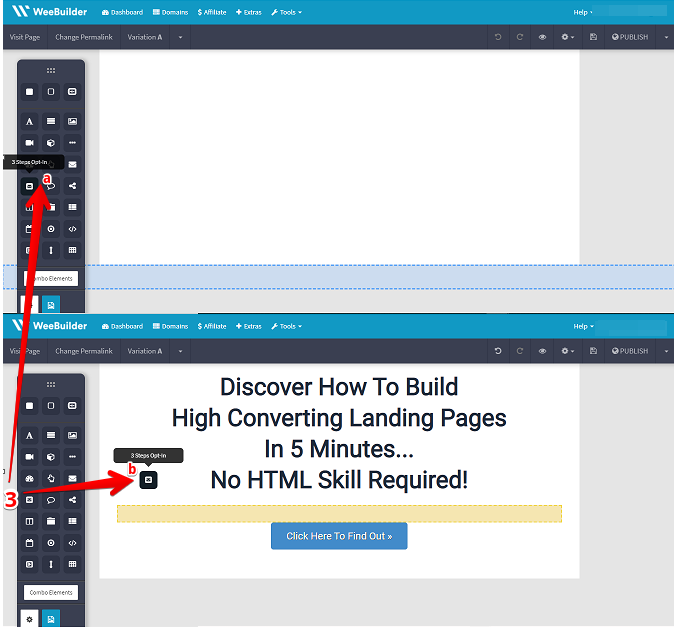
You can now use the template we have for you or you can just click and drag the 3-step optin element over to anywhere on your page wherever you would like it and you just simply edit the 3-steps of your optin pages. An easy breezy step, that’s all you need to do to have the 3-Step Opt-In running on your website.