How To Create A Bonus Page on Weebuilder
This guide will help you make bonus pages inside Weebuilder and will show you how flexible this plug-in is. You will learn how to make totally different bonus pages.
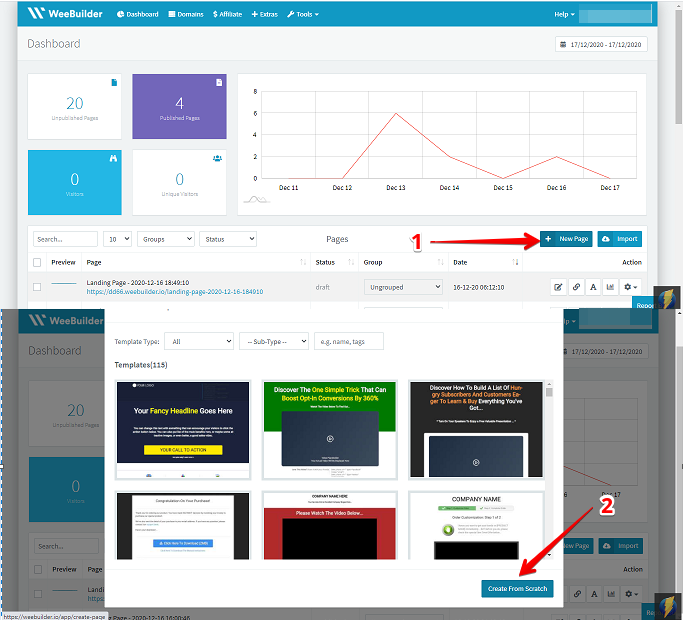
- On you dashboard click on ‘New page’
- Then choose ‘Create from scratch’.
- Once you see that blank canvass on the editor you will have to delete that since this page is a full width page.
- Next is to click on the wide section from the element box on the left, drag and drop it to the upper part.

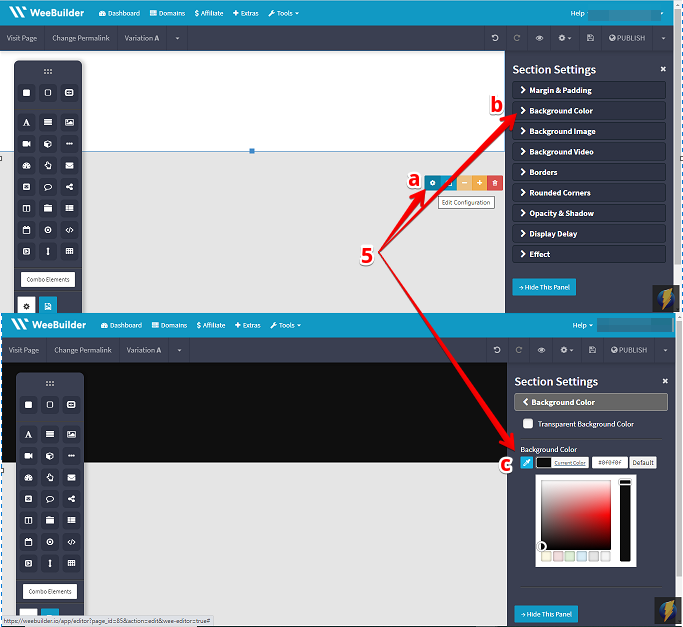
- Next is to change background color depending on your preference. Click on the gear symbol and choose background color.
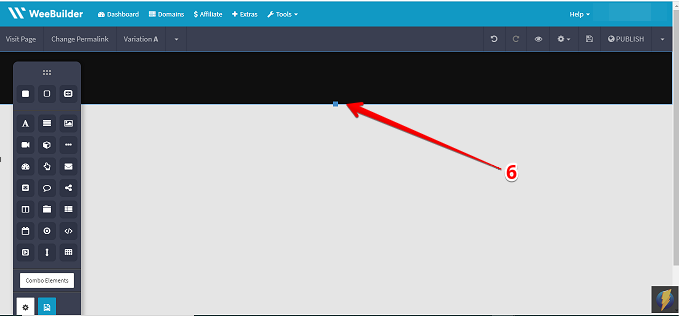
- Next is to shrink that a little bit by dragging it.
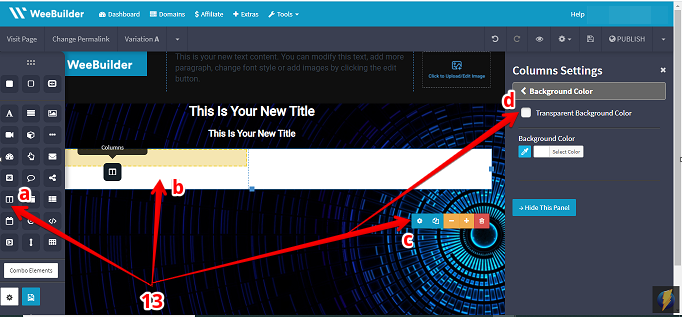
- Probably you want to add your logo and some text on that. Go ahead and add in columns. Drag and drop the column element inside the black box. Perhaps you would want it to have the same color as the background, you just have to click the gear symbol and tickon the transparent background color.

- If you want to add in a logo on the left side column you can go ahead and drag the image element to that part on the page. Then, click on the gear button by doing that you will have two options. One, you could copy the URL of your logo or you can also upload it.
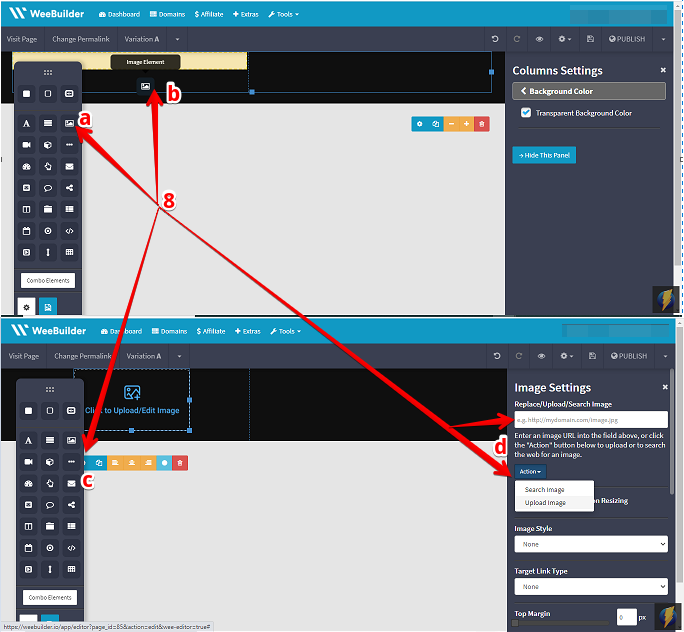
- To upload a file just click on ‘Upload Image’ then ‘Confirm’. This is how it looks when you try to upload a file.

- To upload a text and for example a photo. What you need to do is add in a column. Just click on the box and click on the plus sign in the option and it will automatically add on a column. You can adjust it to the way you want your header to look like.

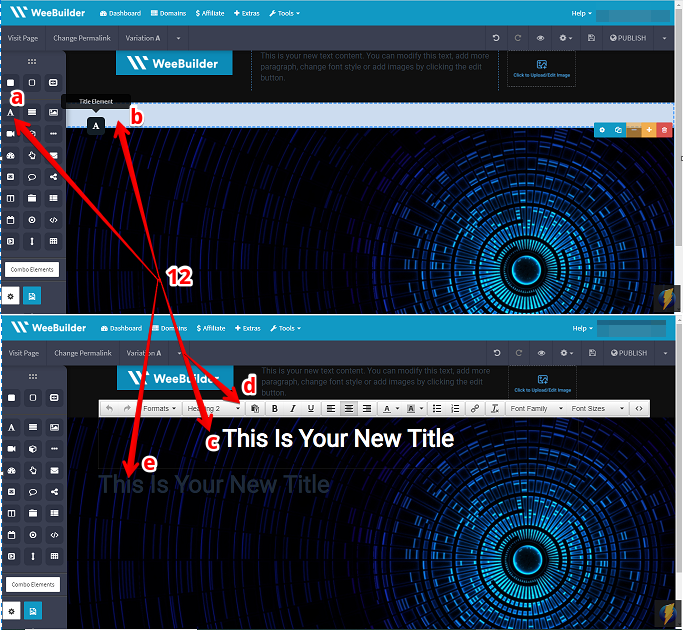
- Once you have a header, next is to create a headline, a video, and perhaps bullet points and a background. To do that, add a new wide section and drop it below the header. To change your background, click on the gear symbol and choose background image. Now, you have four options. You can either enter the URL of the image you want to use, get from the pre-made pattern on Weebuilder, search image, or upload an image from your hard drive.

- You can also stretch or adjust your background. Next, you can add in a title element by dragging that icon. You can go ahead and double click the title element and edit it out to the way you would want it to look like. You can also add in a sub headline if you want by dragging the title element again.
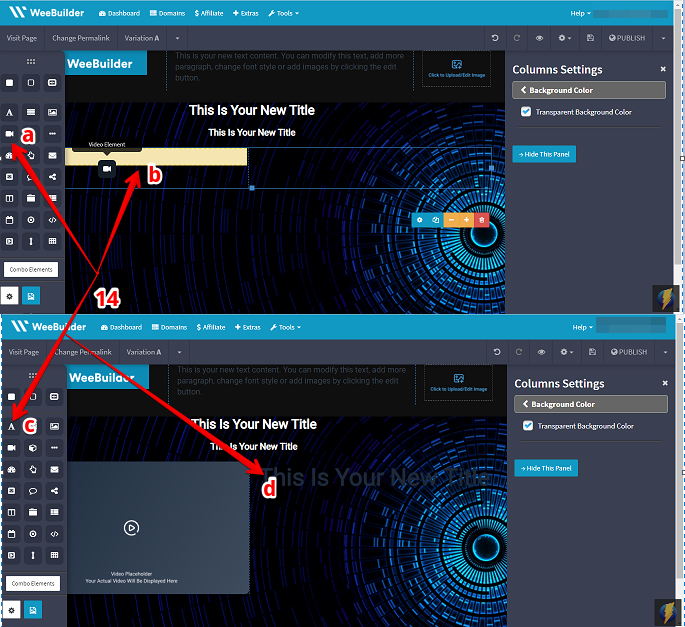
- Next is to add in a video, before adding one you would want to add in some columns again to separate the video from the bullet points later on. Change the setting to ‘Transparent
- Next is to drag the video element on the page you are working on the left column and drag in the title element
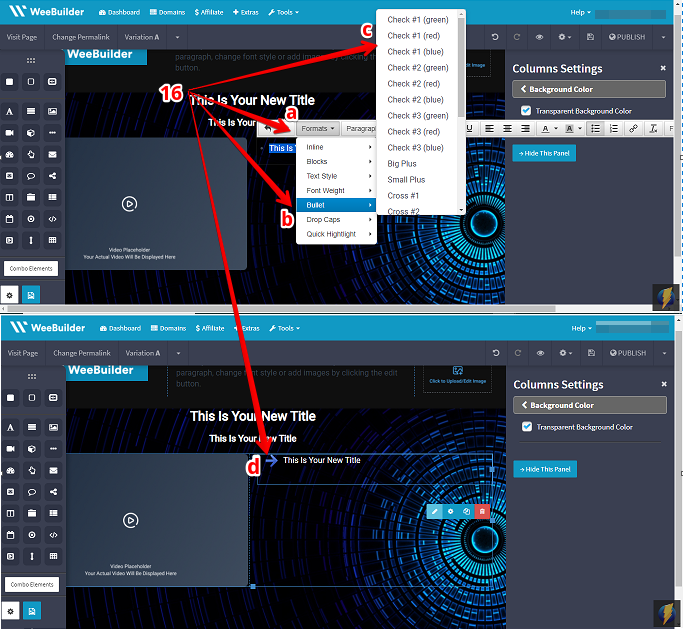
- For you to achieve a bullet point on the title element, double click the title element, highlight the text and click on the bullet option you can also change the color of the text in this case.
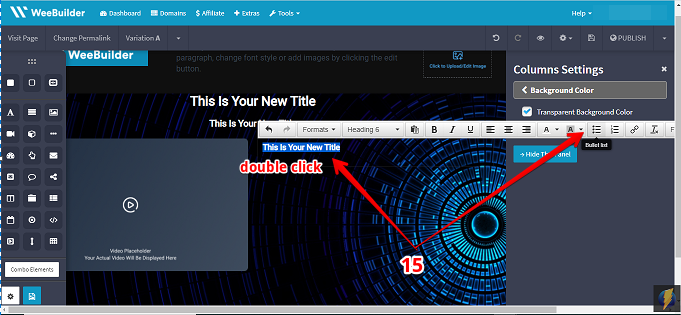
- You can also choose the format of your bullet list.
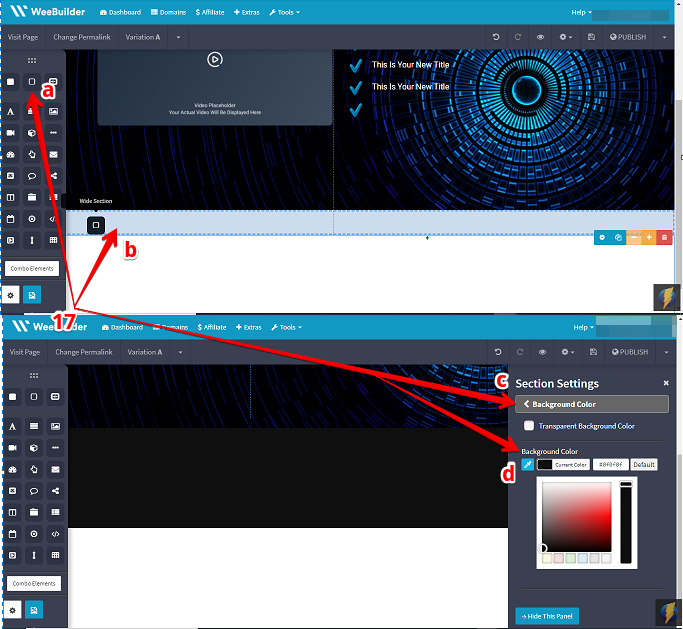
- Maybe you would want to add another section that includes a headline, a countdown timer, and a button. So, what you need to do is add in a new ‘Wide section’, change its color if you prefer doing so by clicking the box and the gear symbol and choose ‘Background color’ on section settings.
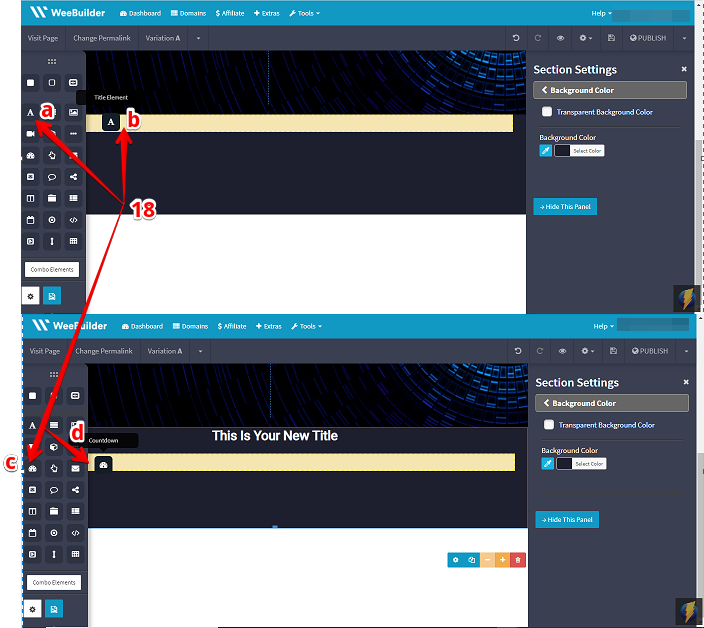
- You can then add in a title element by dragging it again and editing it to your liking. Add in the countdown element by dragging it below the title element.
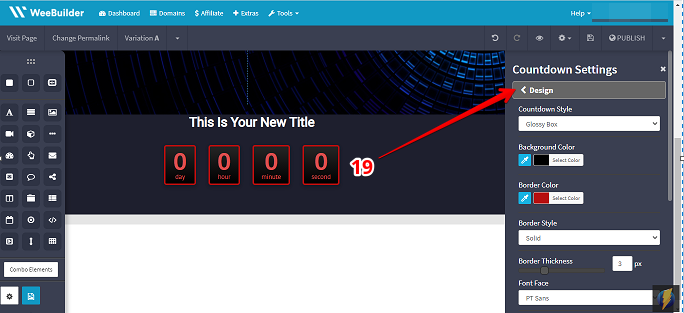
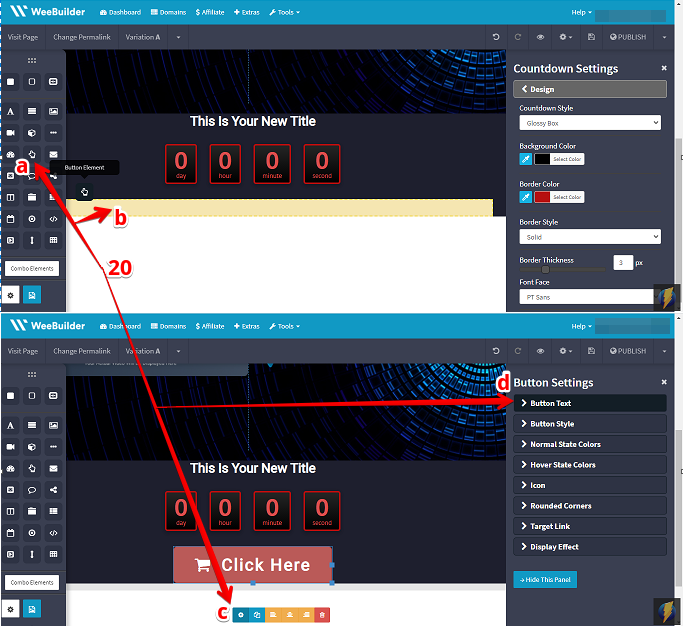
- Then if you want to edit your countdown timer, just click on that and the gear symbol and choose from the different options on the box on the right like the countdown setup, design, and the expiry action.
- Add in a button by dragging the button element and customize it to match the style of your page by clicking it as well as the gear symbol and choose front the option panel on the right.
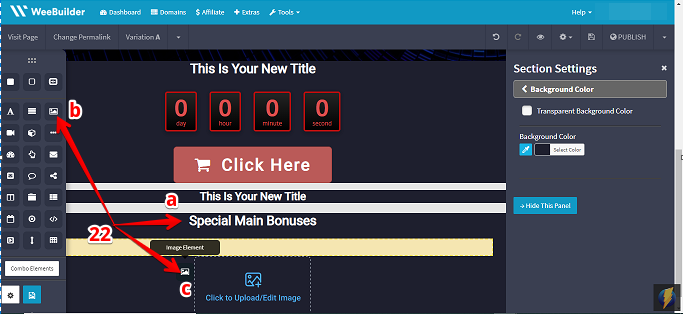
- Let’s add in another section for another header and bonuses on the page you would like to create. First let’s add in a wide section by dragging that element once again below the button you created. That’s gonna give you a new section below you can again change or edit it accordingly. Add in a title headline once again so you can put it anything that discusses about your available bonuses.

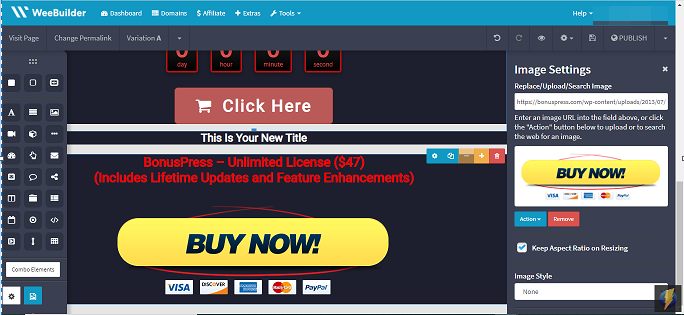
- Again, add in a wide section to put in your available bonuses. Add a title element once again just like how you did with the first sections of the page you are working on. Then add in an image that you want to put that is related to the bonuses you are offering. You do that by dragging the image element below the headline.
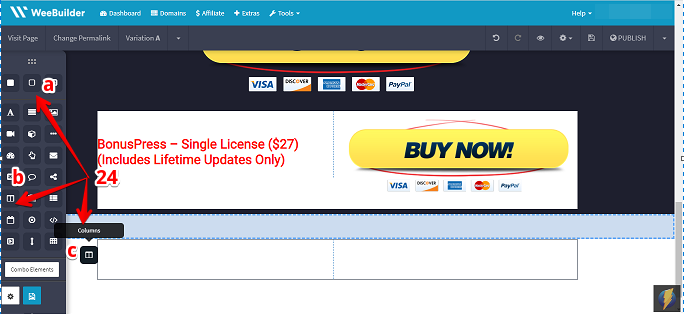
- If you want to keep adding more bonuses you can repeat steps in adding a wide section and adding all the different elements you want on that section.
Tip#1 You can put in a title, a headline, and a call to action text underneath.

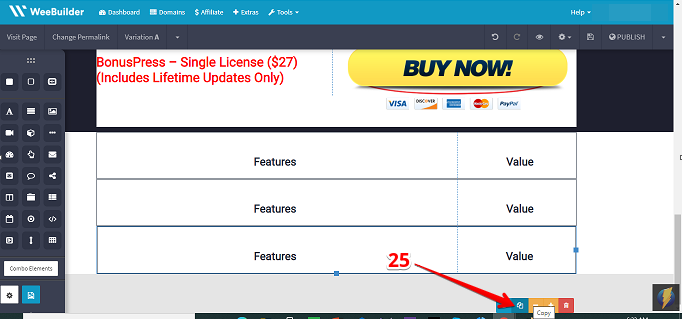
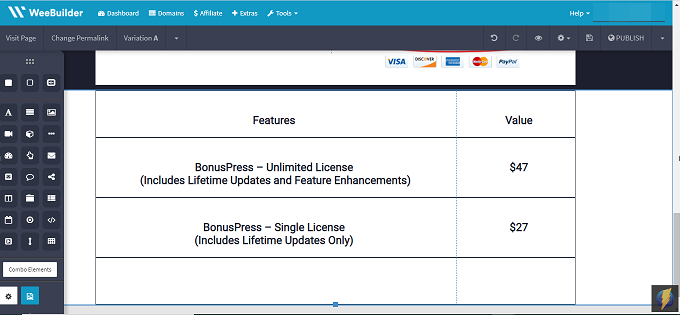
- Now you may decide to add in a table that shows the features and the value of all the bonuses you have created. To create your own table drag in ‘Wide section’ then add in a column.
- To create a table you can just click on the column and click the ‘Copy’ symbol. You can duplicate it as many times as you need to.
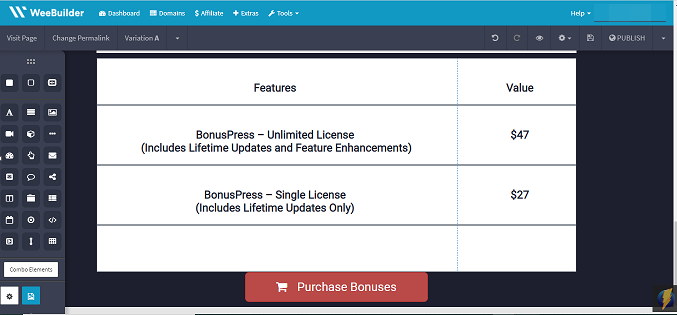
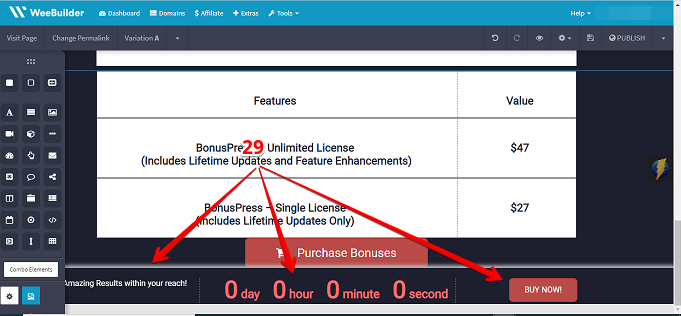
- Now you can add in another button for your bonuses. Just add a wide section and a button by dragging it to the bottom of the page.
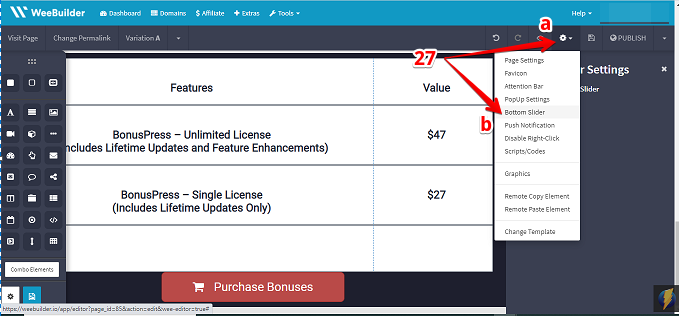
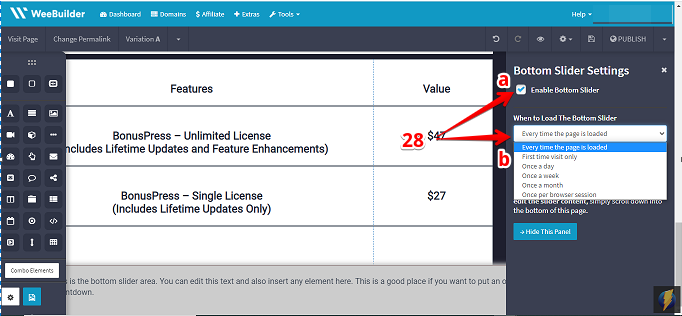
- Lastly, you can add in a bottom slider that is attached on the bottom of the page and has a headline and a countdown timer and perhaps a buy now button. To implement that on Weebuilder, click on the gear symbol on the top right of the visual editor. Then choose ‘Bottom Slider’.
- Tick on the ‘Enable Bottom Slider’ option and make sure that it loads every time the page is visited or by choosing your preference on the ‘When To Load The Bottom Slider’.
- Now you can edit the text on the bottom slider that you have. Add in elements that you want to appear on your bottom slider. Let us add in three columns by using the same steps in adding a new section.
- Do not forget to save your work! Click on this button
 on the top right of the page or preview your work after saving by clicking this button
  .
.
We hope that by following this guide you are able to see the different options and elements we have on Weebuilder that makes building a page with ease and hassle free. Now we would like to show you how to create the exact same template by using a premade template inside of Weebuilder.
What you need to do is follow these easy steps
- In your dashboard click on ‘New Page’ Choose in one of Weebuilder’s premade Sales pages.
- Then you can edit this page the way we have edited the previous one using the different elements and options using the steps above.
- Happy Editing!