How To Create A Page Using Template and Customize It on Weebuilder
Weebuilder created different templates you can find inside the app that will make you buy out more time as you will only be needing a few minutes in order for you to create amazing web pages.
How to create a page using a template
- Go to Weebuilder dashboard and click ‘New Page’ from here you will see different kinds of templates ready for you to use.
- Filters are also provided so you can choose what type of web page you are going to use. You can sort these templates by clicking the drop down button on the template type section. You can then choose from a sales page, squeeze page, launch page, webinar, coming soon, other pages like a system download and thank you pages. You can also choose a sub-type and have the choice from text sales page, video sales page, hybrid sales page, or an OTO sales page. As you choose what type of template you are opting to use, Weebuilder will filter out the rest of the templates and will only provide you the templates that match your criteria.
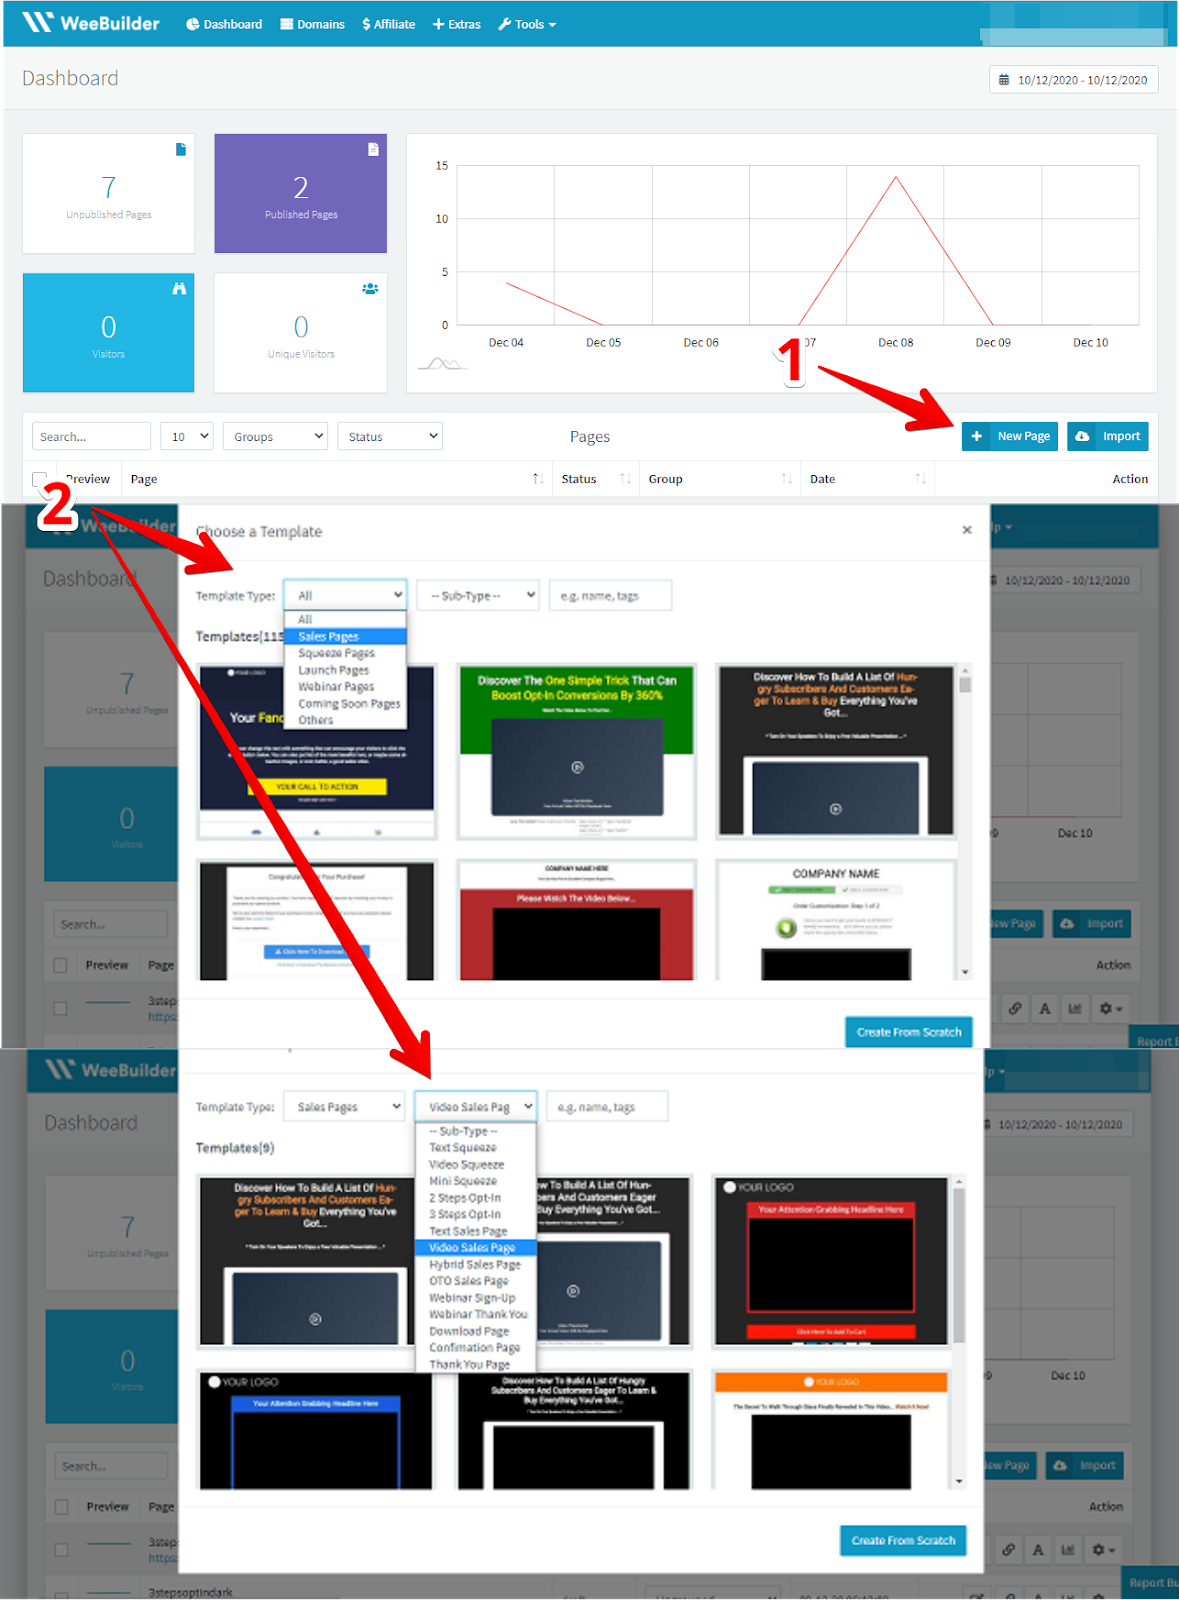
- Once you have chosen what template best suits your web page, for example a Video Sales Page, you just have to mouse over it and you will notice that there is a blue ‘Choose’ or ‘Preview’ button you just have to click on what action you want to do and Weebuilder is going to take you to the visual editor for that template. Once that loads up inside of the visual editor you will notice that template is already pre-populated with content.
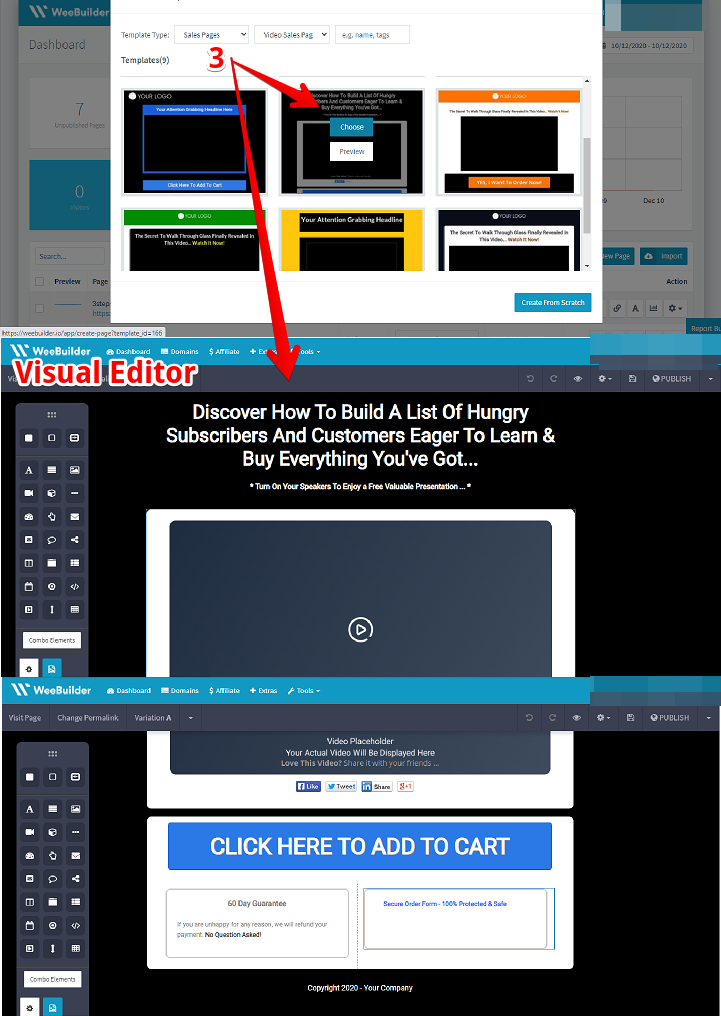
We understand that the content that’s pre-populated is not always what you want on your page. No need to fret, that’s not a problem at all with Weebuilder as changing and editing the page to your liking is simple and easy. You can customize, add, and delete anything you want and do not want on your sales page effortlessly.
- To start editing, perhaps you would want to start on the headline and change what it says to what is more appropriate based on what you envisioned your page would be. So what you need to do is click inside of the headline.
- Then a pencil symbol would appear, you want to click on that or you can double click the headline part and start editing.
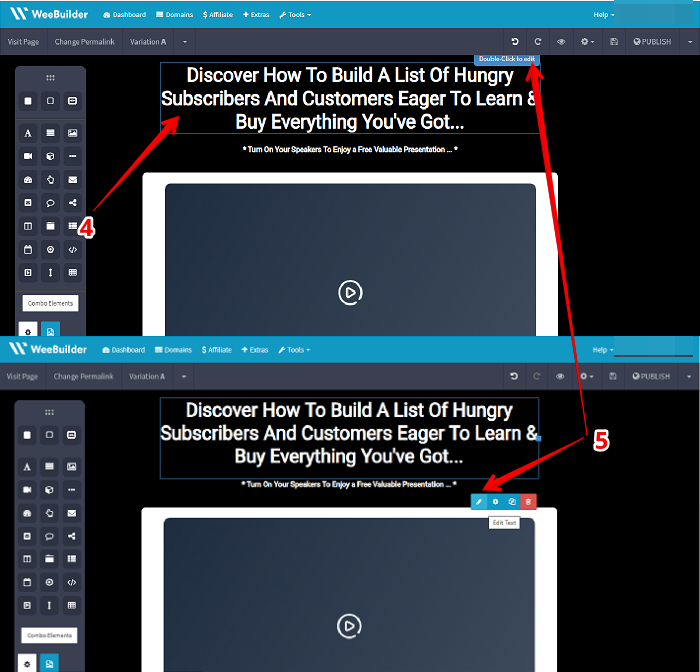
- Perhaps you can say something like, ‘Watch the video below to see how I made $15,000 in my first month online!’ go ahead and type it in on the headline box.
- Maybe you also feel like adding some color to it or highlight words that you want to stand out. What you need to do is just highlight the words or the specific word you want to edit and choose from the color text on the bar your color preference. Voila! It is that easy.
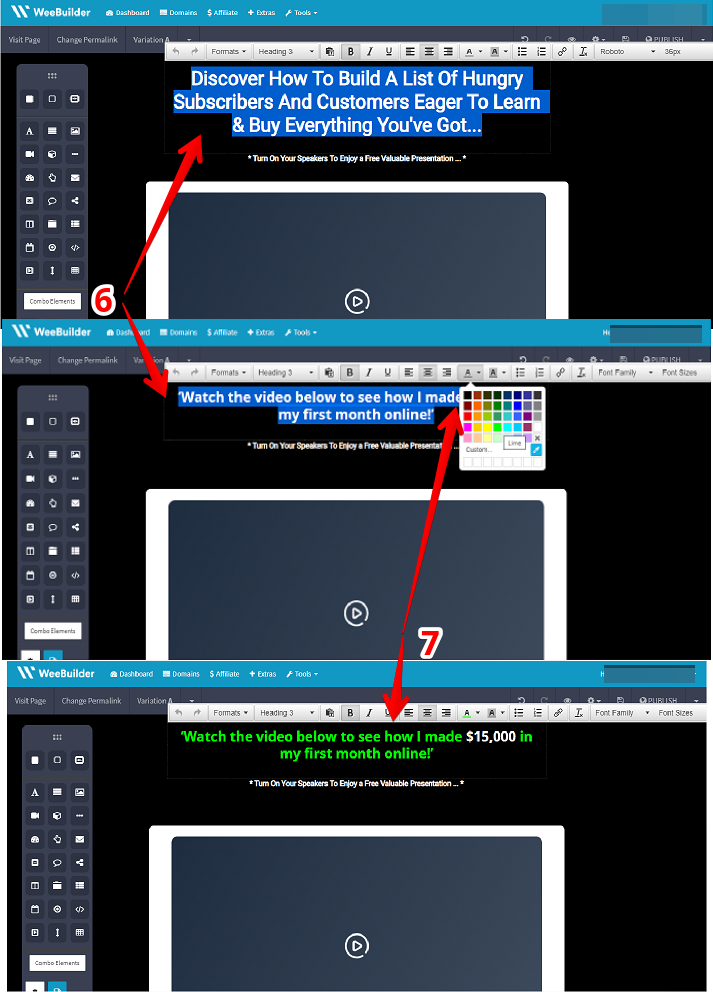
The text bar will help you edit the text box, say for example your headline to your liking. See below different elements found on Weebuilder’s text bar.
- Formats - includes Inline, Blocks, Text Style, Font Weight, Bullet, Drop Caps, Quick Highlight and more.
- Heading - you can edit how your heading will look like based on the choices given.
- Paste as Text - will help you paste text without formatting.
- Bold, Italic, Underline
- Text Alignment - you can align your text to left, center, or right.
- Text Color and Background Color - you can choose the main text color and its background color accordingly.
- Bullet list and Numbered list - this will be very helpful if you want to highlight a few points about your product or the video.
- Insert/edit link - this allows you to insert any link of your choice that you want to appear on your page.
- Clear formatting
- Font Family - helps you change the font style of your text.
- Font Sizes - makes users adjust the sizes of each word in the text box.

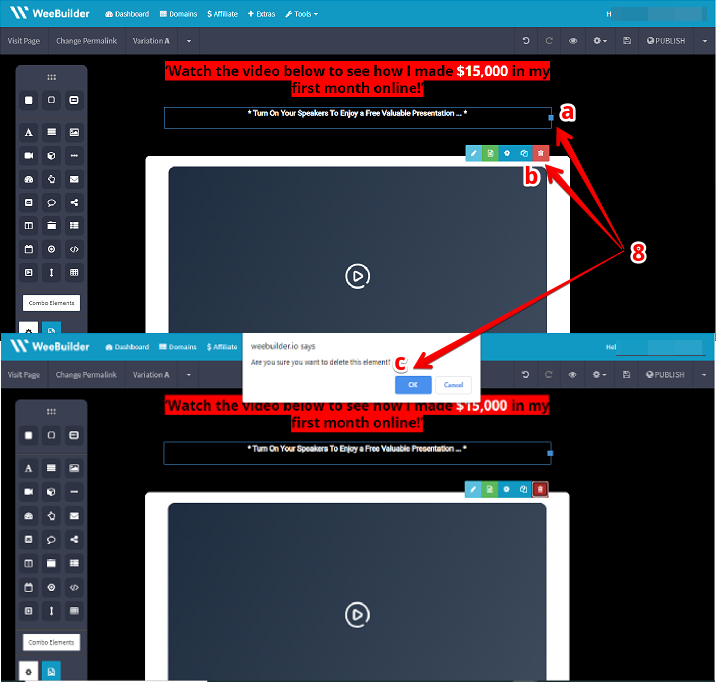
- If you notice, below the headline it has a text that says ‘turn on your speakers’ and maybe you would not want that on your sales page. What you can do is click on the text and click the trash can element, click ‘Ok’ to delete the item on your page. Deleting any element has the same process, just click on the element and click on the trash can and it will delete unnecessary elements on the web page you are making.
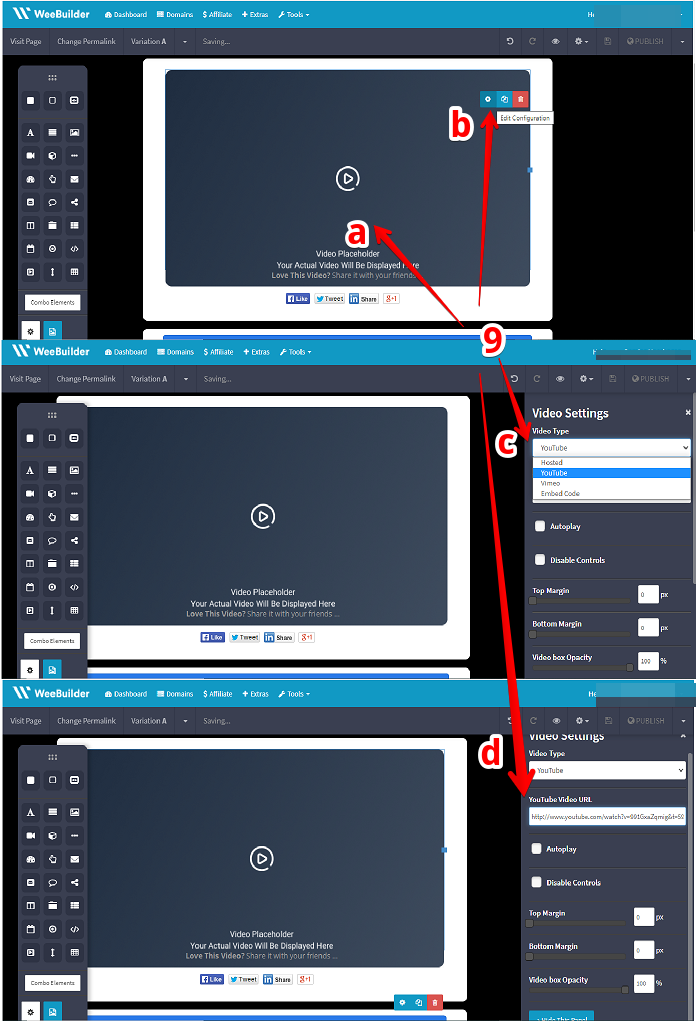
- If you want to edit the video click on it, a gear symbol will then appear, click on that and a box on the right will pop-up. On the box you can choose what video type you are uploading and you can paste your video’s URL below it. You can use videos from YouTube, Vimeo, Host yourself, or embed a code from another website.
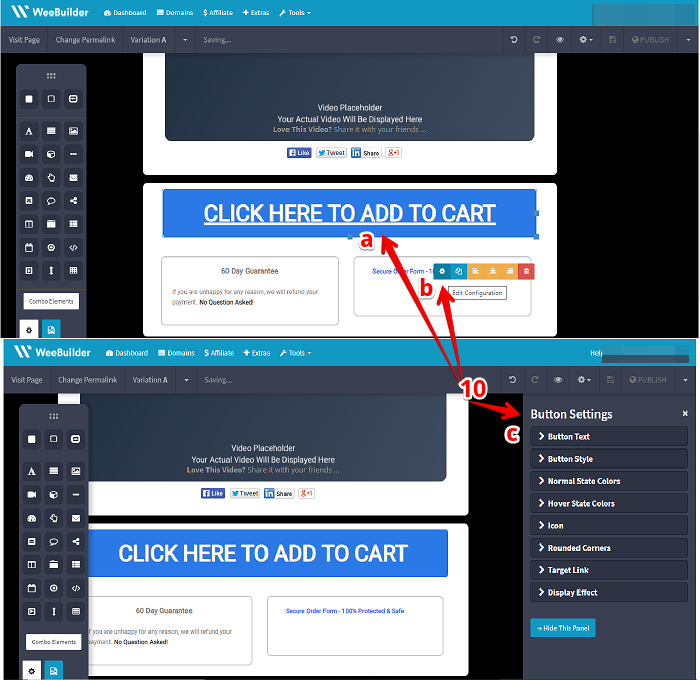
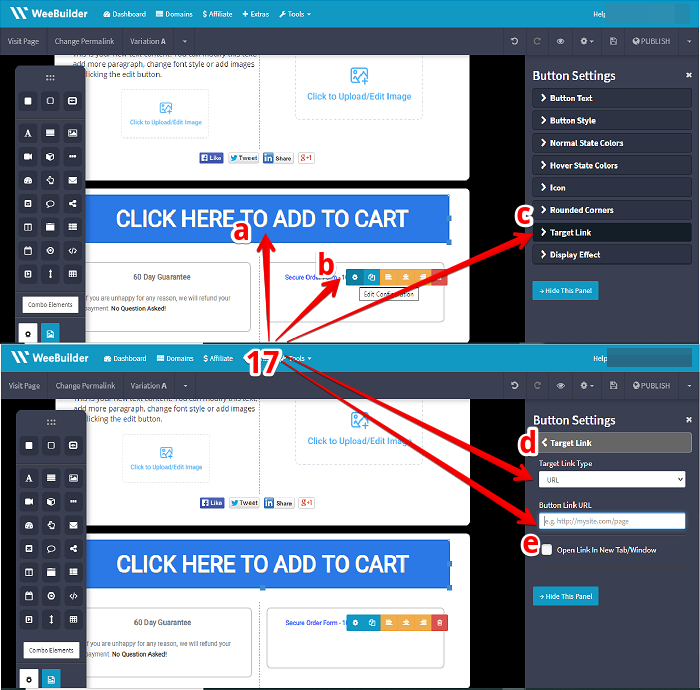
- You can also change the look and feel of the buttons, you can do that by simply clicking on the button and the gear symbol. On the button settings you can change the size of the text, the color, and you can even add a time delay to it if you want to.
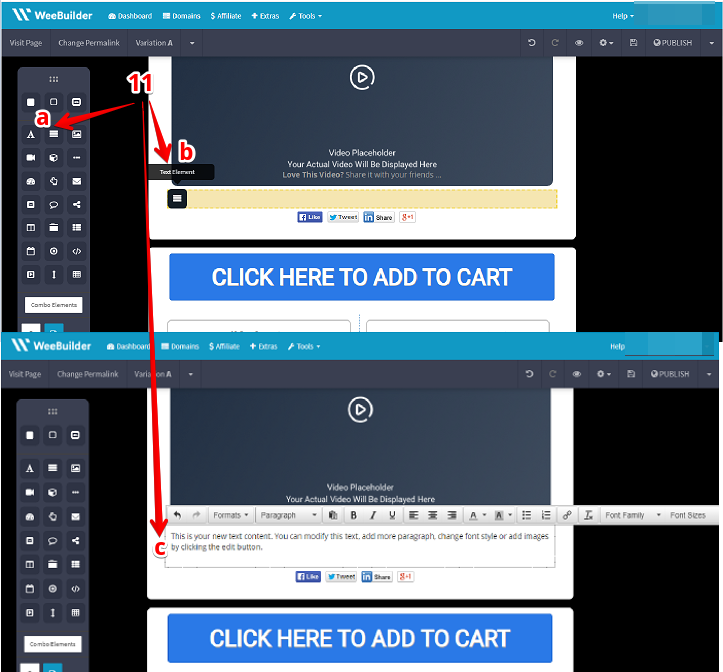
- If you want to add more content to your sales page feel free to do so. The box on the left side of the screen are tools that you can drag and drop anywhere on the page. It includes title element, text element, image element, video element, countdown timers, opt-in forms, button element, graphics, questions, html code etc. This function made it easy to create pages and even creating custom pages by just clicking and dragging. Perhaps you would like to add some text below the video. Just mouse over the text element and click and drag where you want them placed. Then go ahead and edit the text box as you please.
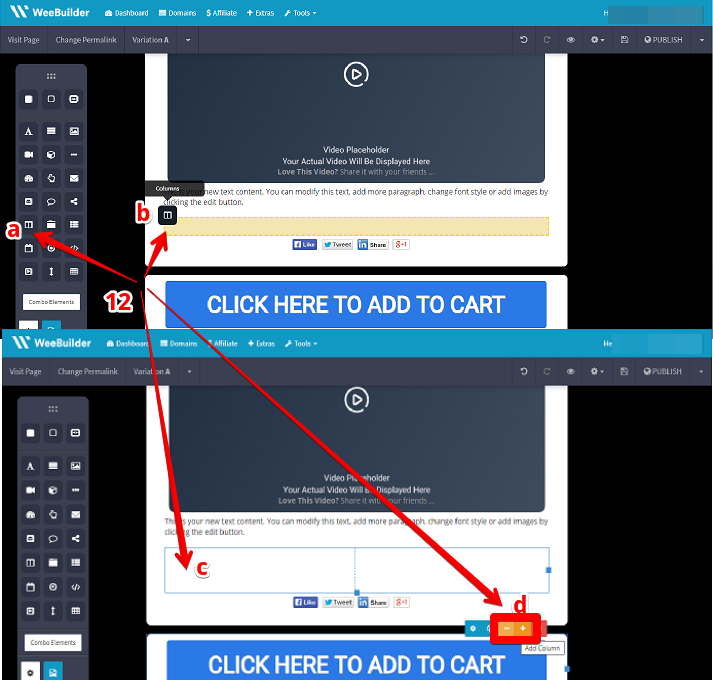
- Another option you can do is adding some columns or bullet points about the main features of your products. You can do so by dragging the column section over and drag it where you want it to be. Right now you have two different columns, if you want to add three you just need to click on the plus sign and now have three different columns or you can click on the minus sign and go back to two columns or click on the minus sign again and give yourself just one column.
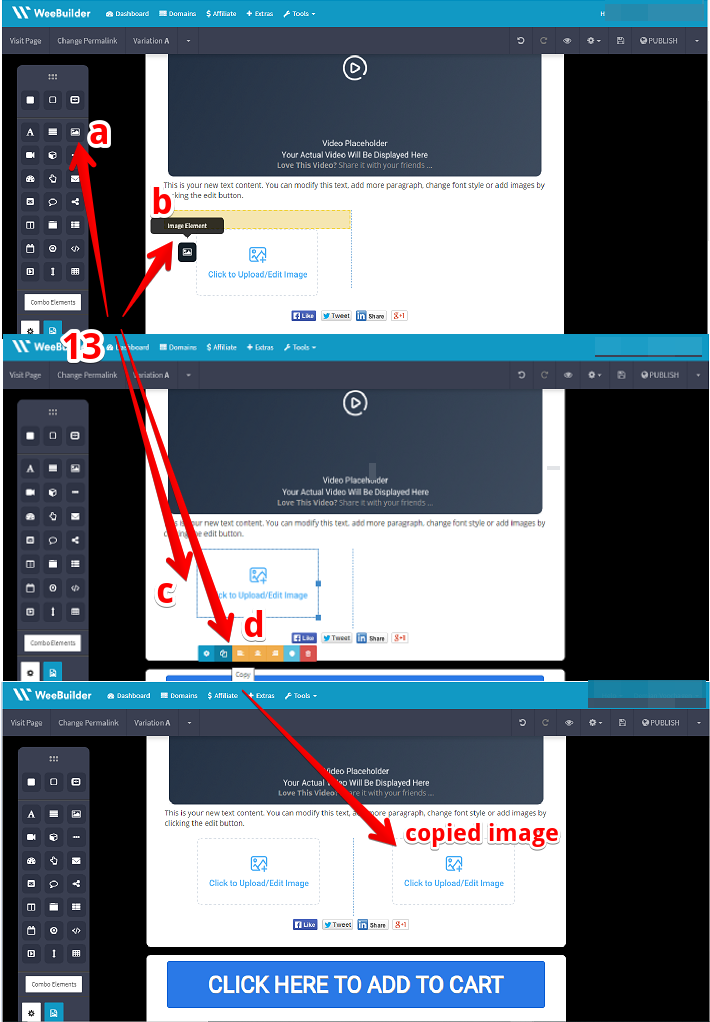
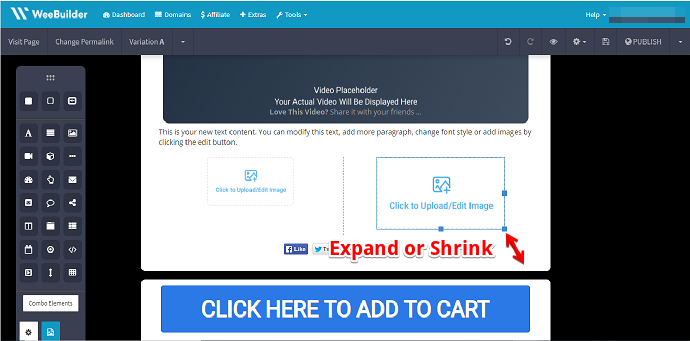
- If you decided perhaps to add in images on the columns you have created. Drag the image element unto the first column and copy it on the second column by clicking the copy element. Note that you can also shrink the images to your liking.
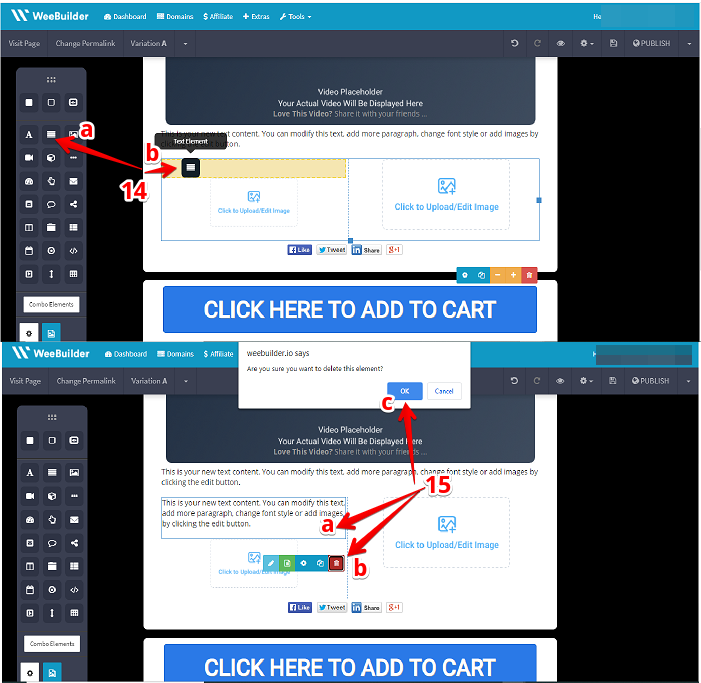
- Perhaps you would also want to add a title or a text to the image you posted, you can drag and drop the text element on top of the image you have uploaded.
- Or if you changed your mind and did not want to put any text element on it, you can just click on text and the trash can element and delete the item. So just like that you can see that it is easy to add , edit and delete things from these templates.
- What if you think that the social media buttons are not necessary? Click on it and the trash can symbol and delete the item.

Now in some cases you might be completely satisfied with your template, the main thing is to make sure that your video is edited correctly and you have your sales video on the web page.
- Make sure also that the purchase button you want to make has the correct information link to it. To check, click on the gear symbol and edit, make sure to change the target link to your order page or your download page wherever it is that they need to go if they are looking to purchase your product.
It is also the same with the templates for the squeeze pages, the webinar registration pages. You want to make sure that you edit your buttons and edit your optin forms and sync them up correctly with wherever they need to be going. Take note that your optin forms need to sync correctly with your auto-responder and your webinar pages needs to sync directly to your webinar registration pages and so forth.
As promised, these templates are very easy to edit. You can just click and drag things around and position it however you want. If you dislike something you can just click on it and click on the trash can and delete that from your template.
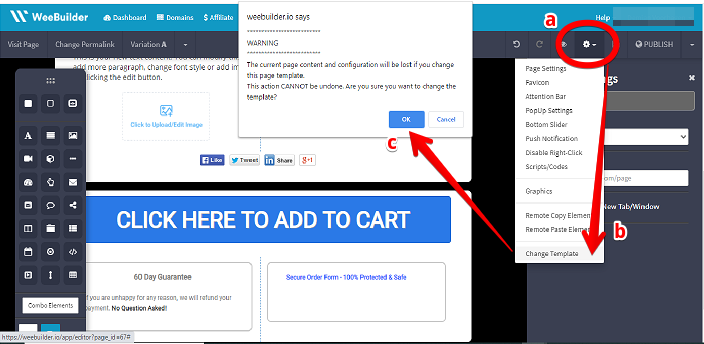
And at any point that you decide that you want to change that template you are working on, you can check the gear symbol on top right click on that and choose ‘Change template’ and then ‘Ok’. Please be reminded that once you do this you will lose any saved information on the page you are working on. Now you can choose a new template you want to work on again.
That’s how simple it is to use our templates inside of Weebuilder to build your marketing pages.