Weebuilder Overview
Weebuilder is an amazing web app that’s modern, and state of the art Page Builder.
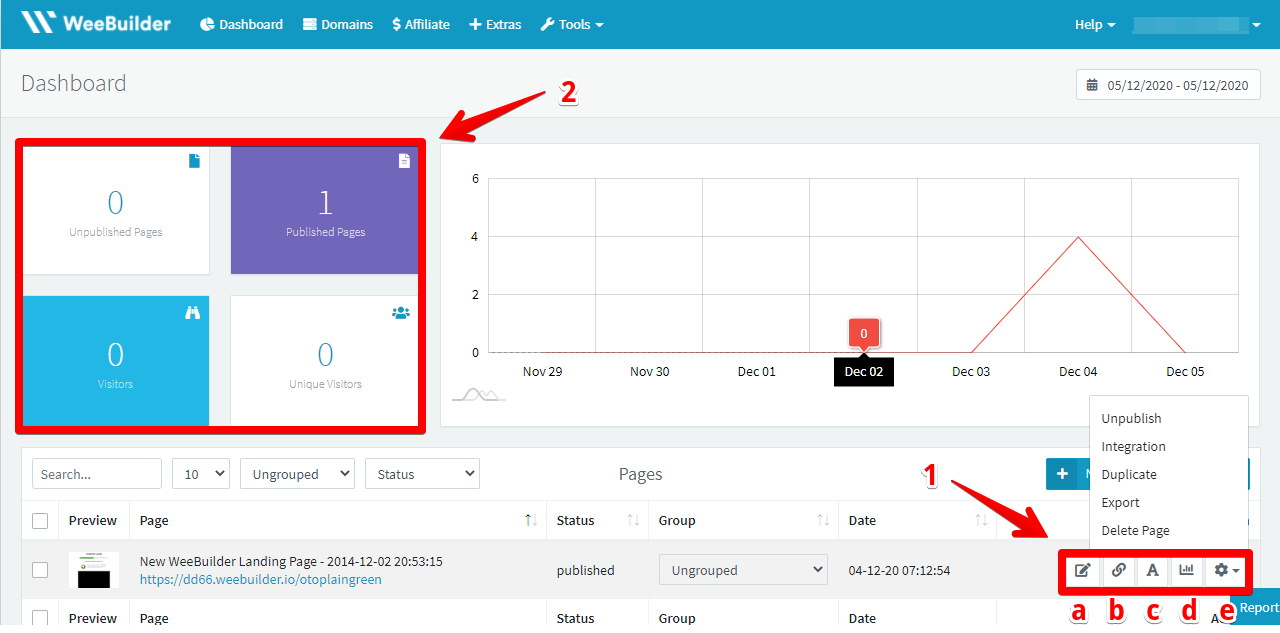
Once you have signed-up on Weebuilder, you can then go to the dashboard. The dashboard will help you see all pages you have made, track your statistics, visitors, and see all the different pages you have created. (1) a. Edit, b. Change permalink, c. Change name, d. Check statistics e. More actions that include Unpublish, Integrate, Duplicate, Export, and Delete the pages options. (2) Quick Statistics can be found on the top left and it includes the amount unpublished, published, page views, and the amount of visitors that you have on your Weebuilder web pages.
Dashboard
Basic Tools
a.) Edit![]() - helps users modify pages they built. (See how to create a page section)
- helps users modify pages they built. (See how to create a page section)
b.) Change Permalink ![]() - allows users to make alterations/amend URLs.
- allows users to make alterations/amend URLs.
c.) Change Name ![]() - let users change the name of the page/s.
- let users change the name of the page/s.
d.) Statistics ![]() - users can check the number of visits, conversion rates, number of clicks and click rates, traffic sources, traffic locations.
- users can check the number of visits, conversion rates, number of clicks and click rates, traffic sources, traffic locations.
Statistics Page

e.) More Actions ![]() - Users have the option to unpublish, integrate, duplicate, export, and delete the pages.
- Users have the option to unpublish, integrate, duplicate, export, and delete the pages.
Let’s dive into the power of the plug-in.
How to create a page
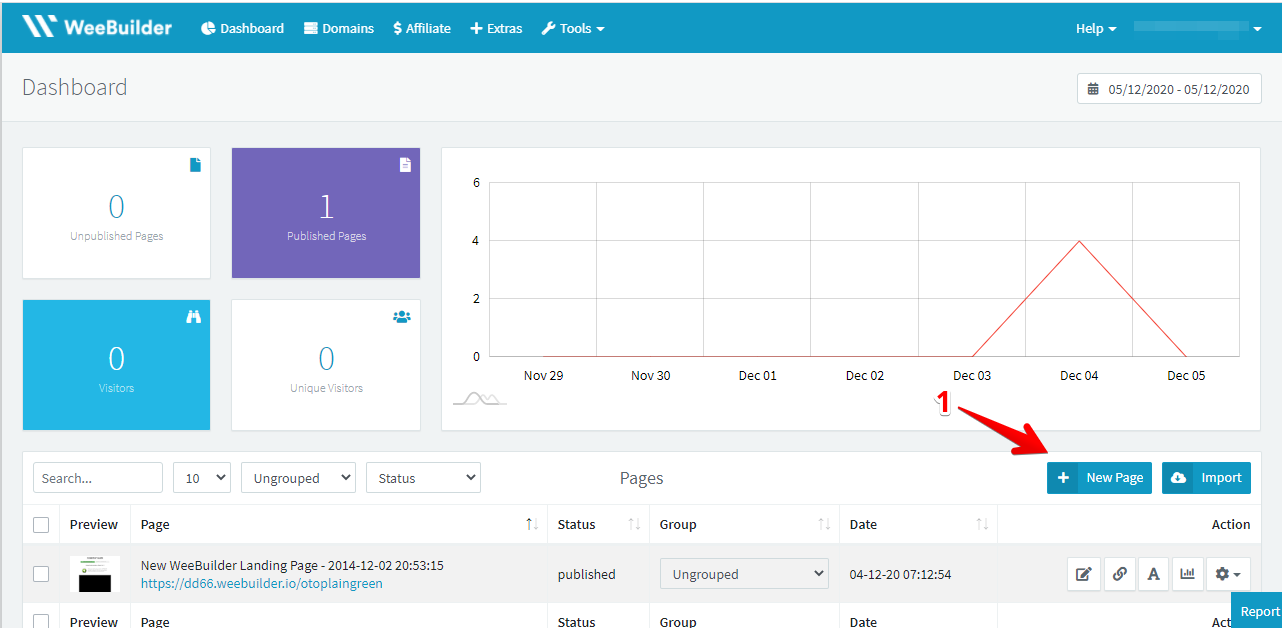
- Click ‘new page’
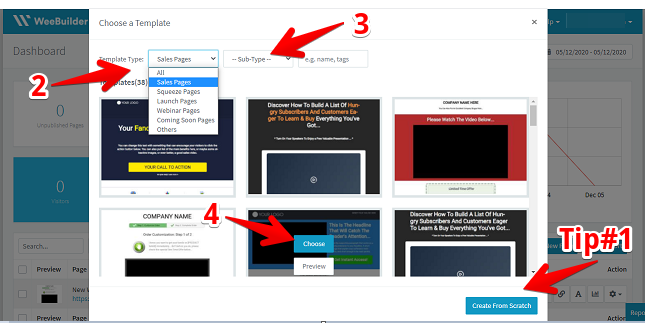
- Choose from the different templates preloaded by Weebuilders. On top we have filters you can apply or choose from.
(Template type Sales Pages, Squeeze pages, Launch pages, webinar pages, coming soon pages, and others)
- After choosing what kind of page you want, the app will automatically filter your preferred template. You can then click ‘Sub-type’ and choose from the options below.
(Text squeeze, Video Squeeze, Mini squeeze, 2 steps opt-in, 3 steps opt-in, text sales page, Video sales page, Hybrid sales pages, OTO Sales page, Webinar Sign-up, Webinar thank you, Download page, Confirmation page, Thank you page)
- You will now have an option to click ‘Choose’ or ‘Preview’ your template of choice. After clicking ‘Choose’, it will populate and load up into your own visual editor.
Tip # 1 These web pages are fully customizable, you can even create your own template from scratch, on a new canvass.
User friendly options to implement on the visual editor
Once you are on the visual editor, mousing over any element on this page will allow you to edit it or change it by simply clicking on it. You are going to notice on the bottom right hand corner of where you click you’re gonna have a few options. These options will sometimes look a little different depending on the type of page you are building however, there are two things that are always going to be present (1) A Gear Symbol that allows you to edit and configure the element that you click on and (2) A Trash Can Symbol that will allow you to delete the element.
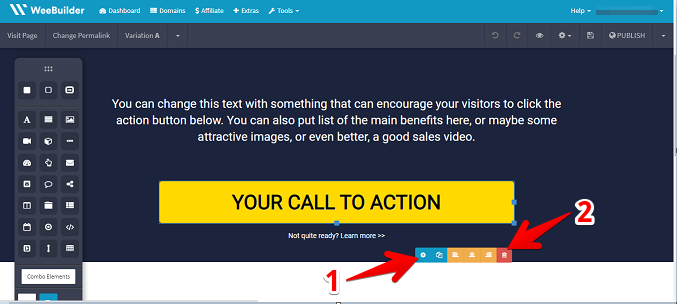
When you click on the gear symbol you will have (3) settings that pop-up on the right part that correlates with the element that you click on. Again, the option on this pop-up is fully dependent on the type of page you are opting to create. At the bottom of your settings you can always (4) click the ‘hide this panel’ option to go back to the main screen.

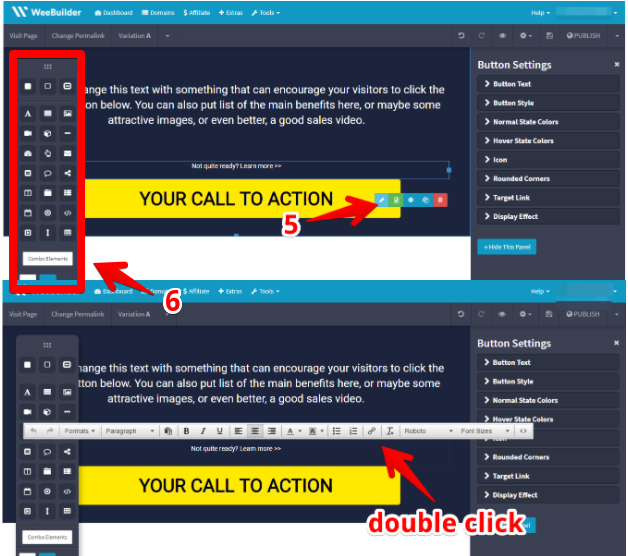
You can also (5) change the text by clicking the pencil symbol or simply double clicking the text box. Note that double clicking the text box will automatically lead you to the text options. You can type right inside the visual editor itself, delete, highlight, and/or change the font, the color as you please. The box on the left side of the screen are (6) tools that you can drag and drop anywhere on the page that you want. It includes title element, text element, image element, video element, countdown timers, opt-in forms, button element, graphics, questions, html code etc. This function made it easy to create pages and even creating custom pages by just clicking and dragging.
How the Drag and Drop Function works
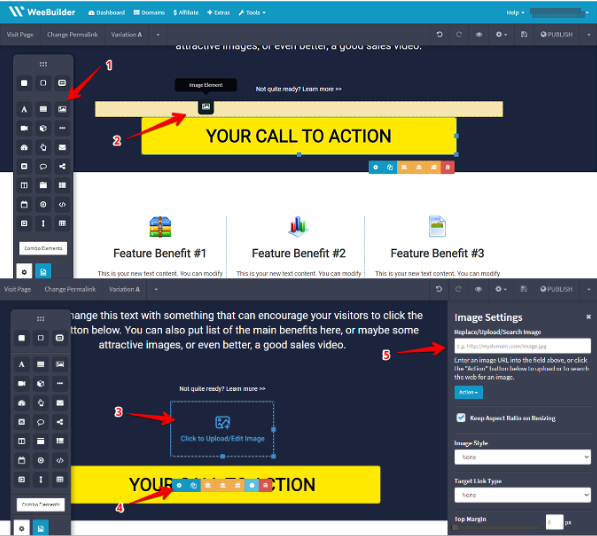
- Choose element from the box on the left in this case we will be using the image element
- Click on chosen element and drag it anywhere you want to place it
- After dragging, this element will appear automatically in placed
- You can then click on the image and choose the gear symbol
- Settings on the right hand side will appear, you can go ahead and search/upload an image then edit your images accordingly.
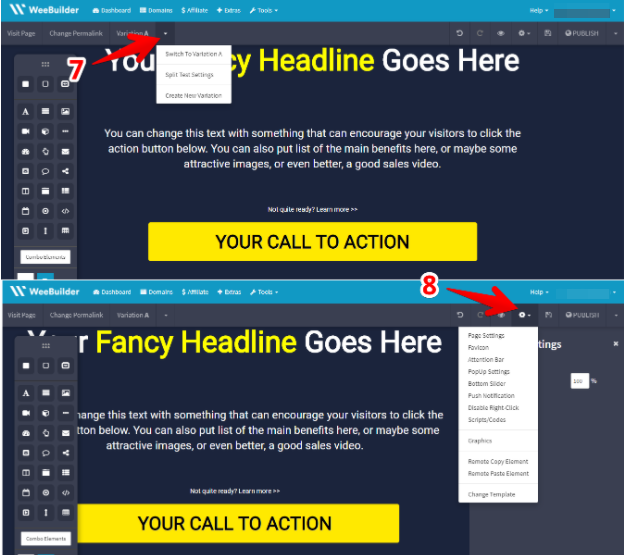
Another feature of Weebuilder is that it allows users to have an option to (7) set up a split test.
You can split test different variations of your pages helping you figure out which one is converting the best and track it within your dashboard. By (8) clicking the gear symbol on the top right, you will be able to edit your page settings, add in notification bar to the top of your webpage, add pop-up to your website, bottom slider, exit splash, a welcome gate, and/or add any scripts or codes that you need like analytics or anything like that.
Inside the page setting users can change the SEO Setting, Advanced SEO setting, page width, general typography or font, the background by adding colors, images or even videos.
After creating and editing your page to your liking, (9) a save option can be found on the upper right. An option to (10) publish and (11) preview a page is also available.
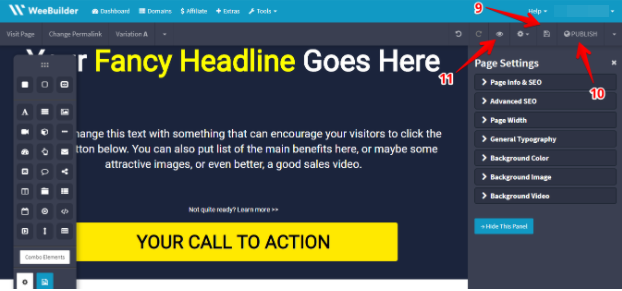
Clicking the publish option will automatically publish your web page and will be saved and can be viewed on your dashboard.

The Preview option will let you see how the web page you made will look like when published, giving you an option to view it in different settings like desktop or mobile.

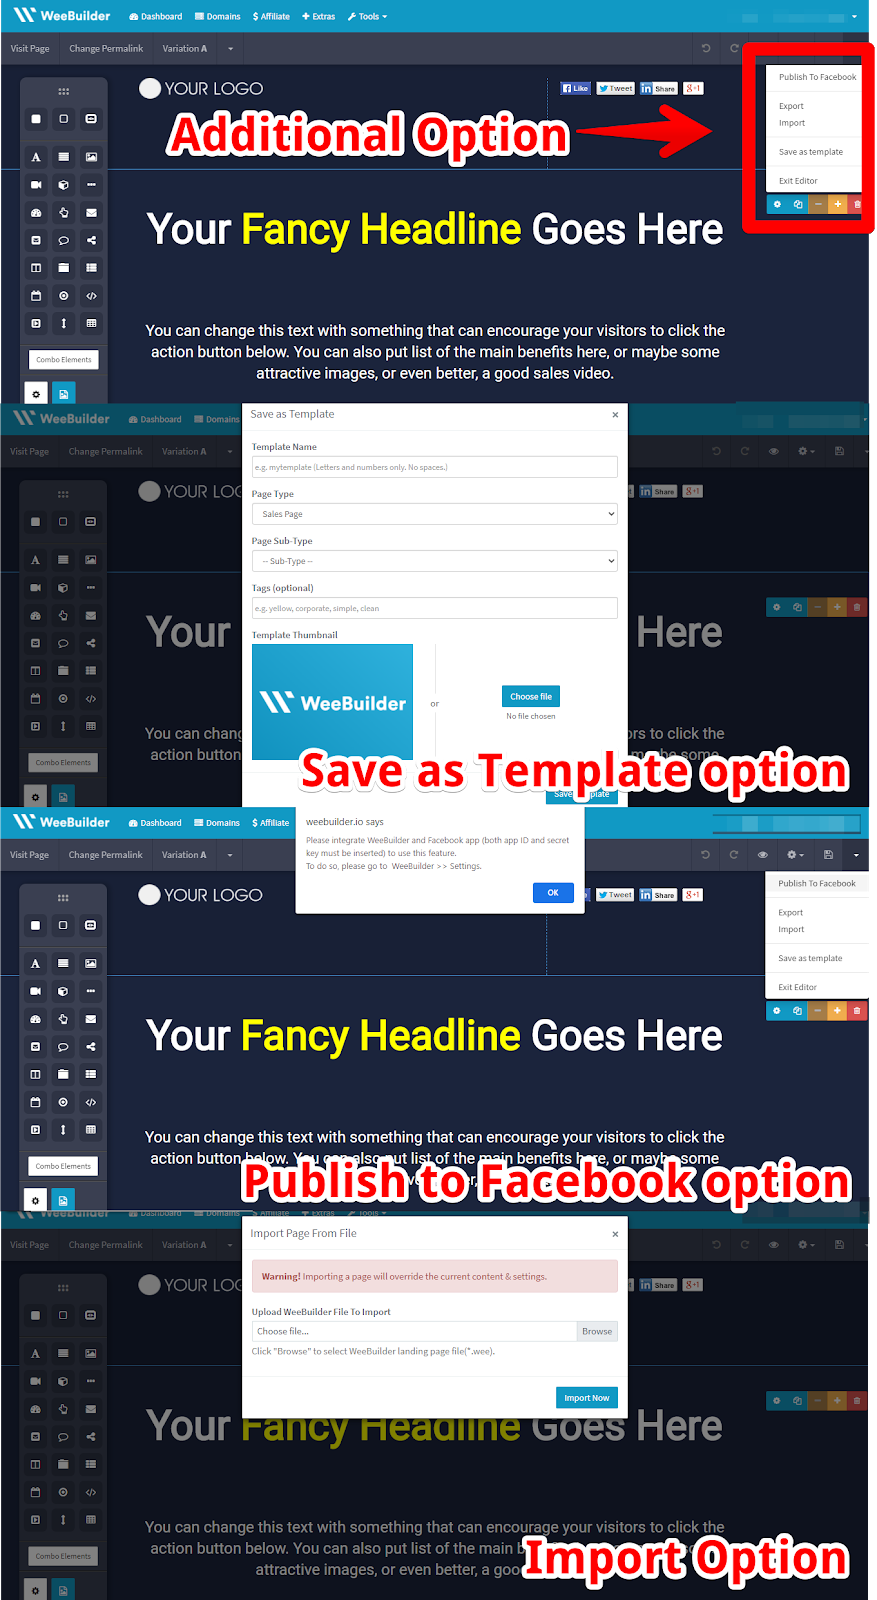
Additional options can be found by clicking the dropdown button on the rightmost part of the page. This let’s users publish their work on Facebook, Import or Export, and Save it as a template, or Exit editor.
Weebuilder is user friendly, easy to use, and customizable. Users can edit anything on the template they are working on by simply clicking and dragging their mouse. Who says building quality marketing pages can be daunting?